
The virtualization product of Microsoft is Hyper-V. In this article, we will look at how to make a virtual switch on this Microsoft product. One of the important things in the world of virtualization is the construction and management of Virtual Switches. This article will teach you how to create a virtual switch on Hyper-V step by step.
Training set for setting up a functional network
To create a virtual switch, we can do it in two ways, one through Hyper-V Manager and the other through PowerShell. This tutorial will explain how to create a virtual switch through Hyper-V Manager.
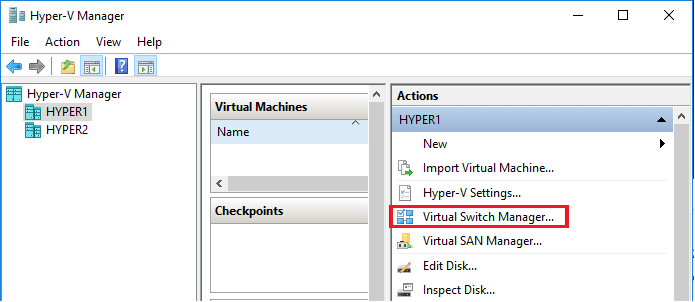
First, run Hyper-V Manager and wait for its window to open.
After the Hyper-V Manager window opens, click on the Virtual Switch Manager option from the right panel, i.e. Actions.

After the window related to Virtual Switch Manager opens, click on New Virtual Network Switch.
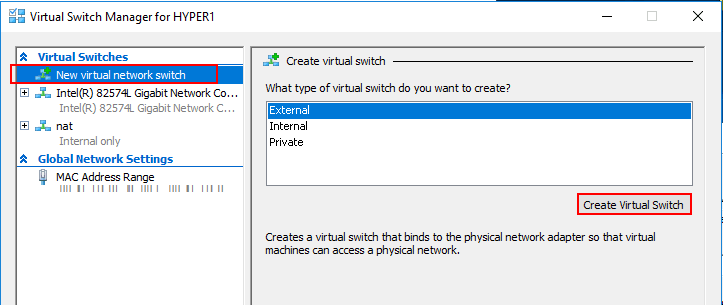

On the right side, you are facing three options, which we will continue to introduce these options.
- External: Selecting this option and creating a virtual switch in this mode allows you to communicate with the network environment outside your host. In other words, this option enables you to communicate with your physical network.
- Internal: By choosing this option, you can communicate only with your host, that is, the Windows server on which Hyper-V is installed. Virtual machine connection with the host and you will not have any connection with the physical network.
- Private: This option only allows communication between virtual machines. Suppose you have a number of virtual machines on your host that you want to communicate only with each other. You can use this option.
Select the desired option and click on Create Virtual Switch according to the network structure and your needs. The following window will open for you.
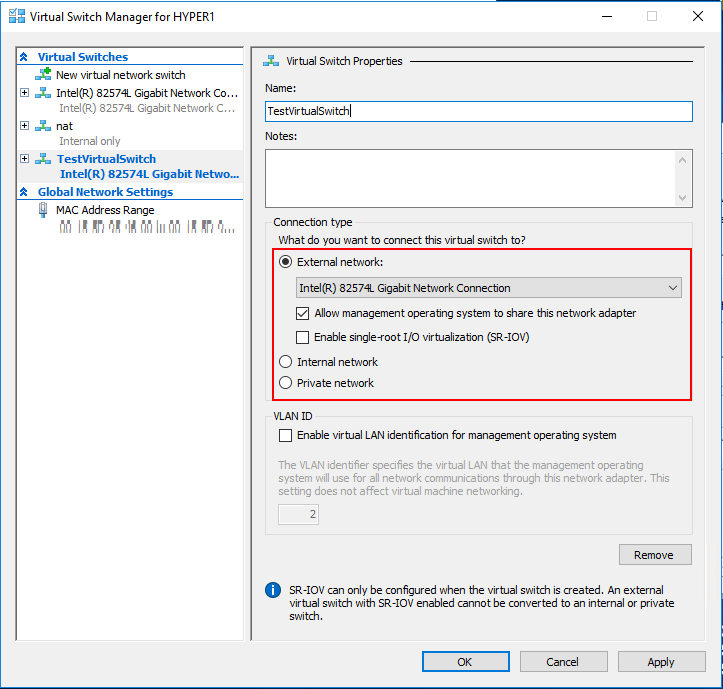

In the Name field, type a name for your virtual switch. In the External Network section, select the physical network card you want to connect. Of course, if you have selected the External option in the previous step. If you use VLAN in your network and you want this Virtual Switch to be in a specific VLAN, you can enter your VLAN number in the VLAN ID field and by activating this field.
Finally, click Apply and then OK.