There are many reasons for adding a new IP in a Windows virtual server, the most important of which are assigning different IPs for two virtual server users and using separate IPs for each topic.
Users can use multiple IPs according to their needs and desires, and there are no obstacles in this regard. In general, there are two ways to add a new IP in a Windows virtual server; each step is simple and short.
For whatever reason, you need to add a new IP to the Windows virtual server you’re directed to. So let’s start this tutorial:
What is an IP address?
Before this tutorial, it’s best to have a quick overview of IP addresses. IP or Internet Protocol is an address that computers use to communicate with each other in any network, including the Internet. For example, the post office will not send a package without the address of the sender and recipient. The address of the recipient is required for the delivery of the package, and the sender’s address for the return of the package (if there is a problem with the delivery).
The devices in the network must know each other’s IP addresses to send and receive data. Otherwise, data will not be sent successfully.
IP protocols are divided into two versions, IPv4 and IPv6. Considering that every device in the network must have an IP address, more IP addresses are needed, which caused the implementation of IPV4 in addition to IPV6.
IPv4 uses a 4-part address and a numbering system (0 to 255) for each part, but IPv6 uses an 8-part and hexadecimal system. Two examples:
IPv4: 192.158.1.24
IPV6: 2001:0:9d38:6ab8:1c48:3a1c:a95a:b1c2
Configuring an Additional IP Address on a Windows Server
You can use two different methods to add a new IP:
1) GUI
1. Open the control panel.
2. Go to Network and Internet > Network and Sharing Center > Change Adapter Settings.
(For faster access to this section, you can press the WIN+R button, type ncpa.cpl in the opened box and click OK.)
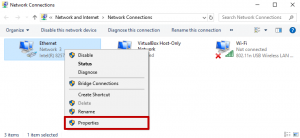
3. Click on Local Area Connection (your selected interface) and select Properties..

4. Click on “Internet Protocol Version 4 (TCP/IPv4)” and then click the “Properties” button.
5. On the General tab, click the “advanced” button.
6. Click the Add button in the IP addresses section.
7. To add a new IP in the virtual server, enter the IP and Subnet mask and click Add.
. Click OK to close the Advanced TCP/IP window.
9. Close the (TCP/IPv4) Properties window by clicking on Ok.
10. Click the Close button to close the Local Area Connection Properties window.
Note that adding new IPs in Windows Server is enough to follow the same steps and to add an IPv6 address, you only need to select the “Internet Protocol version 6(TCP/IPv6)” option in the properties section, and the rest of the steps for Both addresses are the same.
2) PowerShell
Open Windows Powershell by following the steps below.
1. Open the RUN environment by pressing the Windows+R key combination.
2. In the opened box, type powershell.exe and press Enter.
3. Enter the following command.
$ New-NetIPAddress -InterfaceIndex “IndexNo” -IPAddress “IP Address” -PrefixLength “subnet mask” -DefaultGateway “Gateway Adress”
IndexNo: Specifies the index of a network interface for which a new IP is to be created.
IP Address: It is the new IP address that you want to add to the Windows virtual server.
PrefixLength: This parameter determines the size of the local subnet and is also known as the subnet mask.
default gateway: Specifies the IPv4 address or IPv6 address of the host’s default gateway. This gateway provides a default route for TCP/IP hosts to use when communicating with other hosts on remote networks.
An example:
$ New-NetIPAddress –InterfaceInde 8 -IPAddress 198.168.1.38 -PrefixLength 24 -DefaultGateway 192.168.1.1
Attention! If you like to have a fixed external IP to remove restrictions related to areas such as trade, website development, external payments and international freelance work, you are also open to changing and creating a new IP on the server. You can use Ded9 Server’s virtual servers.