

Photoshop is considered one of the most useful software for photo editing and logo design. One of the many uses of this software is converting a photo into a logo. In the rest of this article, we are going to learn how to convert a photo into a logo in Photoshop and examine the most important principles of photo selection. So stay with us until the end of the article.
Choose the right image.
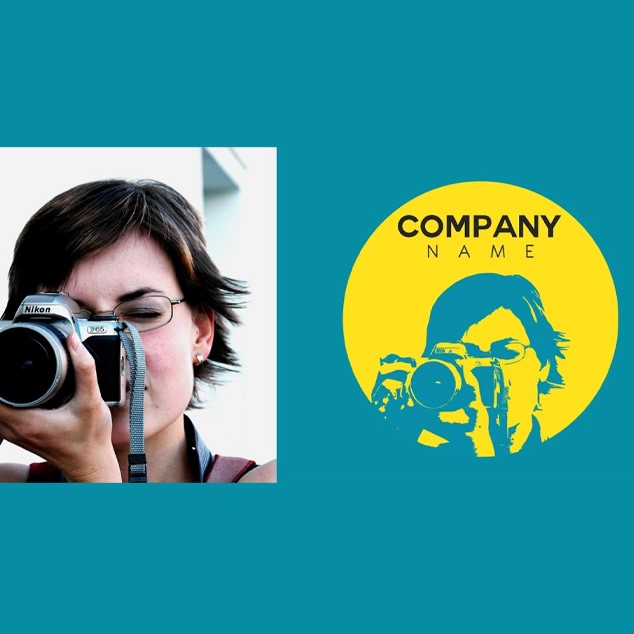
In fact, it can be safely said that the most important step in converting a photo into an online logo is choosing the right image. As you know, logo design is one of the most lucrative and popular jobs in the world of digital marketing. For this reason, as a designer, you need to choose an image suitable for the client’s business.
Another important point that you should pay attention to while choosing the desired image in order to convert png to a logo is the resolution of the selected image. It is obvious that the quality of the image greatly impacts the audience’s attention. For this reason, the quality of the images you want should be high.
Of course, it is also worth noting that you will be able to slightly improve the quality of images by using Adobe Photoshop software. For this reason, if the quality of your chosen image is not very good, you can improve its quality to some extent by using Photoshop software. If you are interested in designing with Photoshop, also read the background article for logo design!
Image brightness and contrast
In the continuation of online photo-to-logo conversion, you need to adjust the brightness and contrast of your image because you need to separate the light and dark parts from each other. If you do not adjust the brightness and contrast of the desired photo correctly, you will face problems in the next steps of converting the photo into an online logo. Among the problems you may encounter, we can mention the loss of image quality, the inability to separate dark and light parts correctly, etc.
In order to adjust the light and contrast of the photos, you need to enter the Image section through the top menu of the Photoshop software. After opening the relevant section, click on the Adjustments Layers option. Then you can click on the Levels section through the mentioned window. By clicking on the Levels option, a window related to the light and contrast settings of the image will be displayed.

According to the articles on converting a photo to a logo on a computer, you need to place the colors in the photo in such a way that there is a contrast between them. Doing this will actually increase the quality and resolution of your photo. Also, one of the other reasons for the contrast between the colors of the image is to make it easier to convert the photo into a logo online.
Also, an important point that content production experts have emphasized is the image’s contrast level. Be careful to keep the contrast of the image balanced.
Black and white image
In the continuation of the process of converting a photo to a logo in Photoshop, you need to enter Image and then Adjustments Layers again through the top menu. By entering the relevant section, you must click on the Threshold option this time, unlike last time. By selecting this option, a window related to darkening and brightening the images will be displayed. Through the mentioned window, you will be able to adjust the black-and-white level of your photo.
According to the opinion of the professors and experts in the content production order, the more you increase the number, the darker your image will be. Obviously, as the number decreases, the black level of your photo will decrease. It should be noted that the more dark your photo is, the more details will be seen.
So, it can be said that if you intend to design a logo with high and precise details, it is better to increase the darkness of your image. But if you want your logo to lack detailed details, you can reduce the darkness of the desired photo. An image’s darkness and lightness completely depend on the logo you intend to design and the designer’s taste.
Remove extra parts of the image.
Perhaps by reading the higher parts of this article, the question will arise for you, how to remove the extra parts of the image? In answer to this question, we have to tell you that in order to do this, you need to remove the parts you don’t need by using the Brush tool, which is on the left menu of Photoshop software.
After making the desired changes in the image based on the online photo-to-logo conversion article, you need to select the highest desired layer through the Layers section. By selecting this layer, your final image and logo will actually be displayed. You can also combine all the layers in the photo by pressing the combination keys Ctrl + Shift + Alt + E.
By pressing the mentioned keys, the process of converting a photo into a logo in Photoshop has been completed to a large extent. You are only a few steps away from completing your desired logo by completing the above steps!

Separation of the created design from the background
That being said, you are only a few steps away from converting your desired photo into a logo. The last step of the online photo-to-logo conversion is to separate the created design from the background of the desired photo. In order to do this, you need to use another tool Photoshop software.
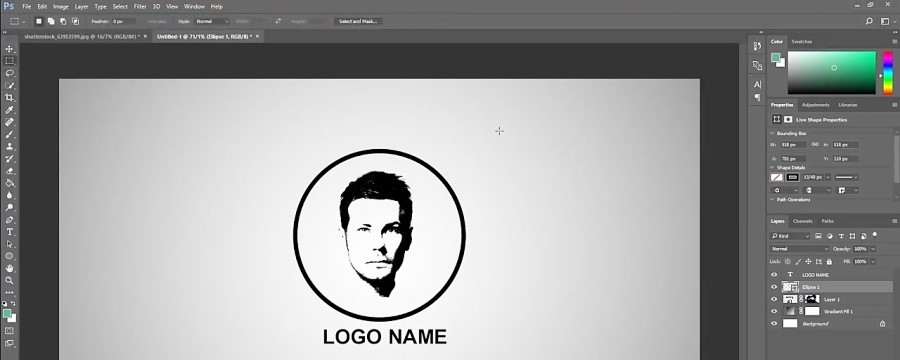
To do this, you need to click on your image’s black and dark parts using the Eyedropper tool. To select this tool, you can select the Select option from the menu at the top of the software and then select the Color Range section. After choosing the desired tool, you can click on the black parts of the image. The color of these sections will be copied by clicking on the black sections.
After selecting the black parts, you should use the combination keys Ctrl + J to separate your designs from the background. After separating the desired parts, you can make your desired modifications to the final design. For example, many logo designs of big companies use structures or geometric shapes to complete their logo. You can use these geometric shapes to surround or border your final shape.
After finishing the work, in order to output the desired image, according to the articles on converting a photo to a logo online, you can proceed through File and Save. Windows users can also use Ctrl+S for this purpose. Of course, the way to output images in the Mac operating system is slightly different from Windows. Mac users should use Command+S combination keys to get output from the desired image.