


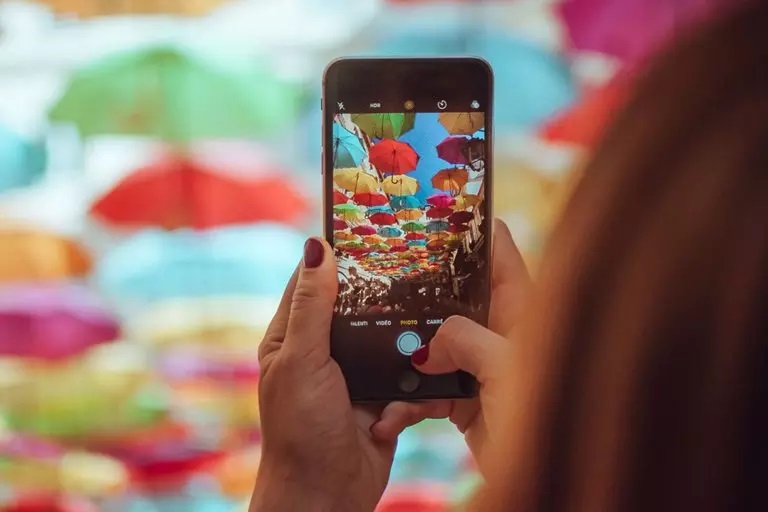
How To Shoot Like A Professional With A Mobile Phone?
Smartphones Equipped With Quality Cameras Can Be Seen In The Hands Of Almost Everyone Today; Therefore, By Following Some Tips And Applying Various Settings, Everyone Can Create High-Quality Photos Technically And Artistically.
Mobile photography tricks
Today, almost all smartphones have a variety of features such as abundant megapixels to a variety of image editing applications to create beautiful and high-quality images. Although smartphones are not as good as professional cameras in many ways, there are some things you can do to achieve stunning artistic and technical images with your mobile phone, some of which are even comparable to professional camera images.
In this article, we will refer to the technical and aesthetic concepts of mobile photography and provide tips for creating better images and photography like professionals.
This article is divided into three sections: In the first part, you will get acquainted with the correct method of composition and the use of different tools for correct composition; In the second section, we introduce methods for proper lighting; In the third part, you will learn how to edit an image in one of the mobile applications.
Combining with mobile
Composition in art photography has general rules that also apply to mobile photography, But some smartphone features can be used to improve the composition. Here are the following points:
- Use gridlines to balance the image
- Adjust the camera focus
- Focus on the subject
- Use negative space
- Finding different perspectives
- Play with reflection
- Use guidelines
- Search for symmetry
- Search for duplicate patterns
- Avoid excessive magnification
- Record small details
- Create abstract images
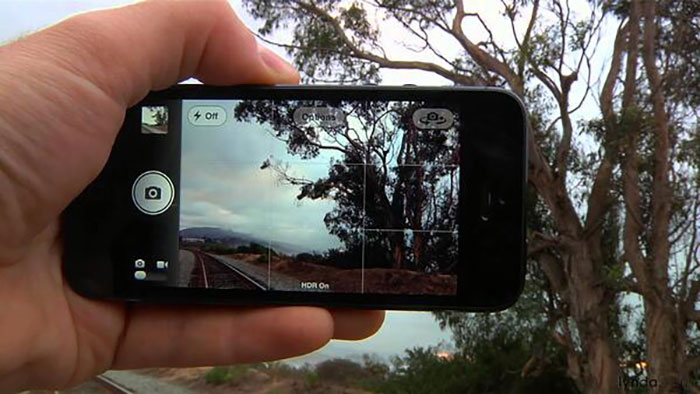
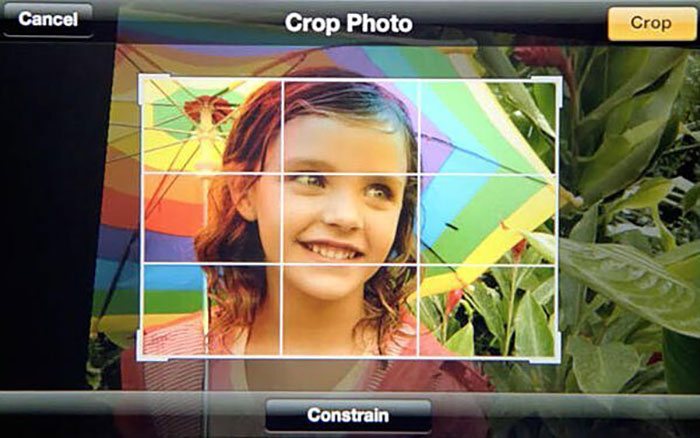
Use gridlines to balance the image
One of the easiest and best ways to improve mobile images is to activate the camera grid lines. Thus, lines appear on the screen according to the “one-third” rule of composition. According to this law, the image is divided into three parts horizontally and vertically, which creates a total of nine parts. According to this theory, if you place your favorite points in these sharing areas or the direction of the guidelines, your image will be more balanced and more pleasing to the viewer.
To enable gridlines on your iPhone, go to Settings, then select Photos & Camera and enable Grid settings. To activate this section on the Samsung Galaxy, open the camera app and go to the Settings section. Scroll down the page and turn on the gridlines option.
Adjust the camera focus
Current phone cameras automatically focus on the background, But not all images need a clear subject. To adjust the focus of the lens, open your camera app and tap on the screen in the desired location to increase the sharpness.
If you want to shoot a moving subject, these settings can be easily made; But tap the screen to adjust the focus before capturing the image to make sure the moving subject has enough focus. A circle or square icon appears on the camera screen that shifts the focus of the image to the content inside the icon.

Focus on the subject
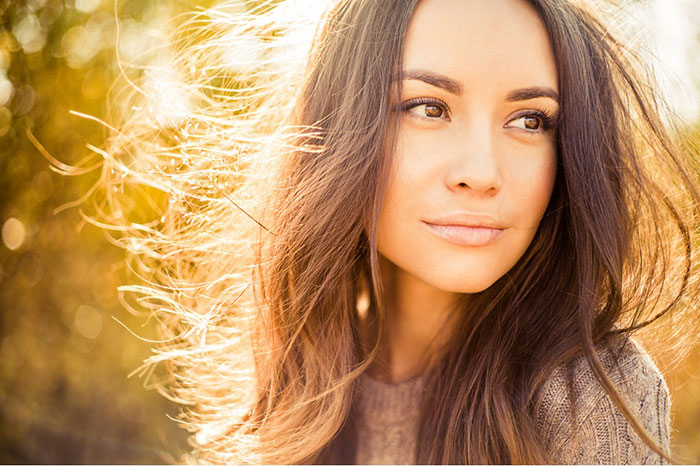
Many great images have only one fascinating subject; As a result, spend time adjusting images when shooting. Some professional photographers say the subject should not fill the entire frame and the negative space should cover two-thirds of the image. In this way, the subject becomes more visible.
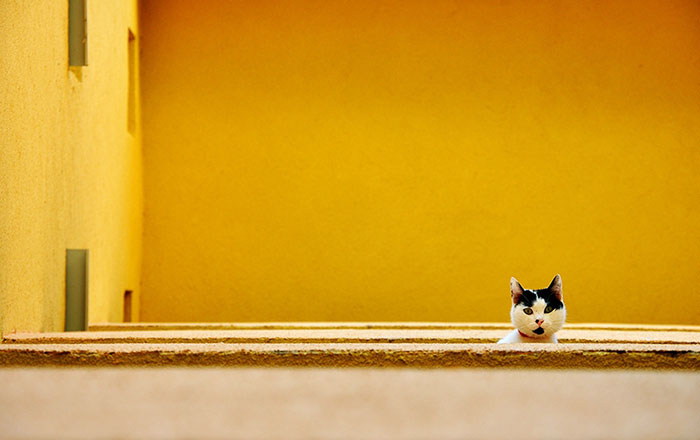
Use negative space
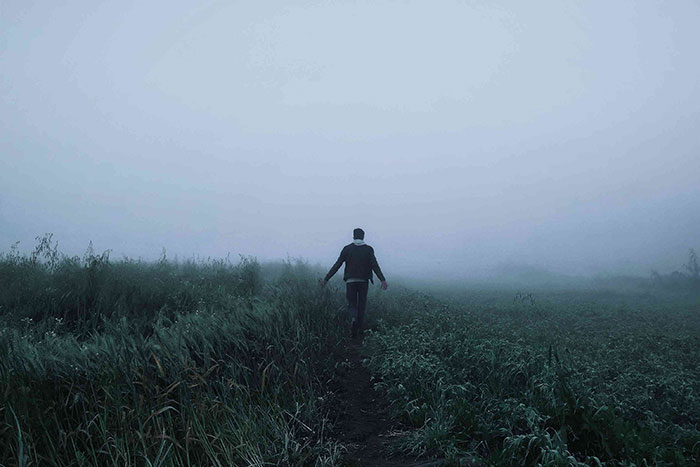
Negative space is the area around and between the subjects of each image and can change the image from good to great. When you consider a lot of space in the photo, the subject shows itself more and the audience is more impressed; But how to show the negative atmosphere? Negative space can be a large part of the sky, empty areas, a large wall, or a large portion of water.
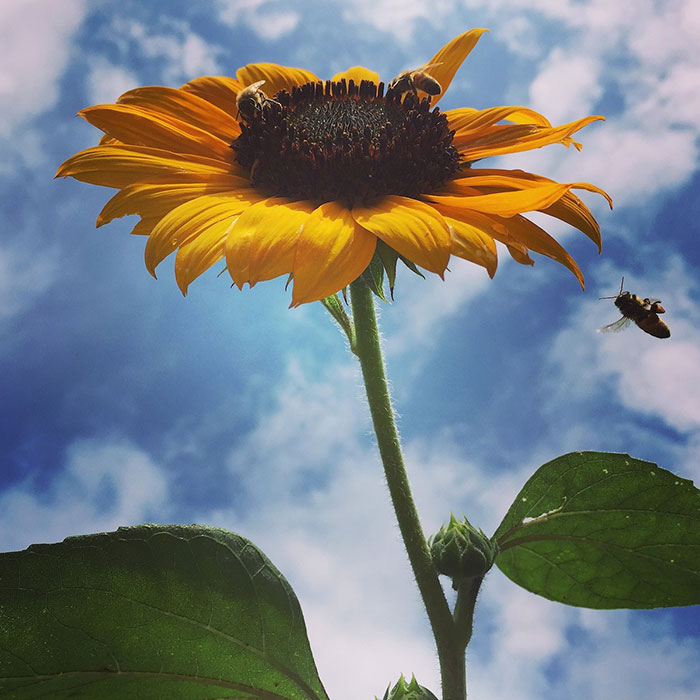
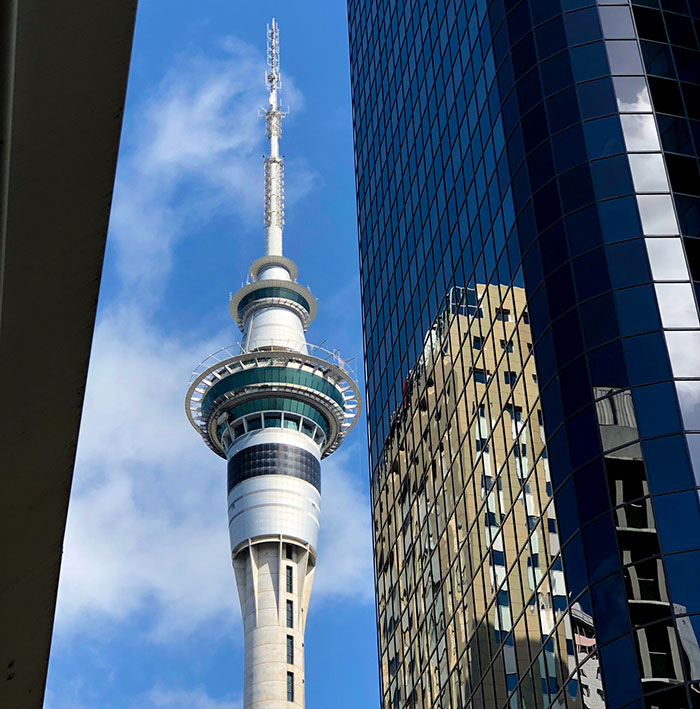
Find different perspectives
Capturing an image from an unexpected and unique angle can make the image more memorable. This conveys a sense of depth or height to the subjects as well as highlighting them; Because most mobile images are taken directly or from a bird’s eye view. Try to bring angles such as the sky perspective as a negative space in your images or take a top-down shot.
Note: If your perspective is distorted or distorted, you can use the SKRWT image editing application to correct lines.
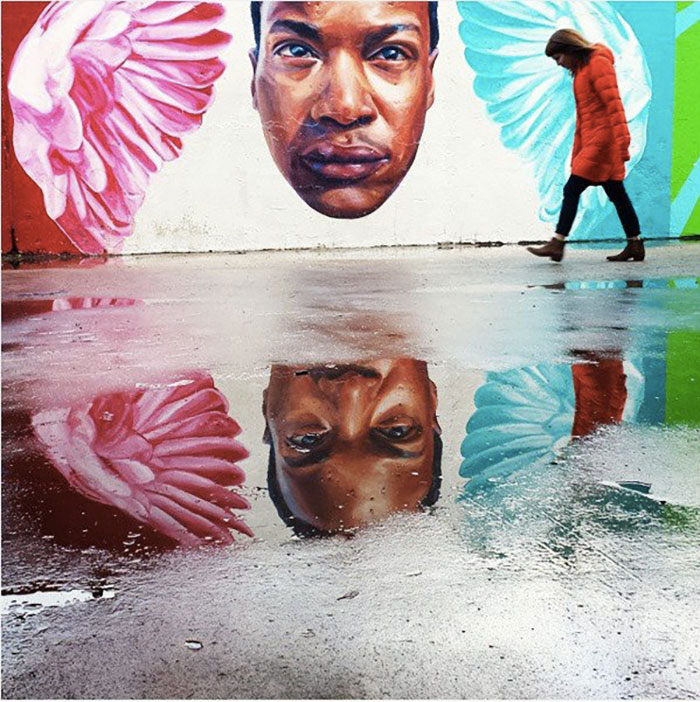
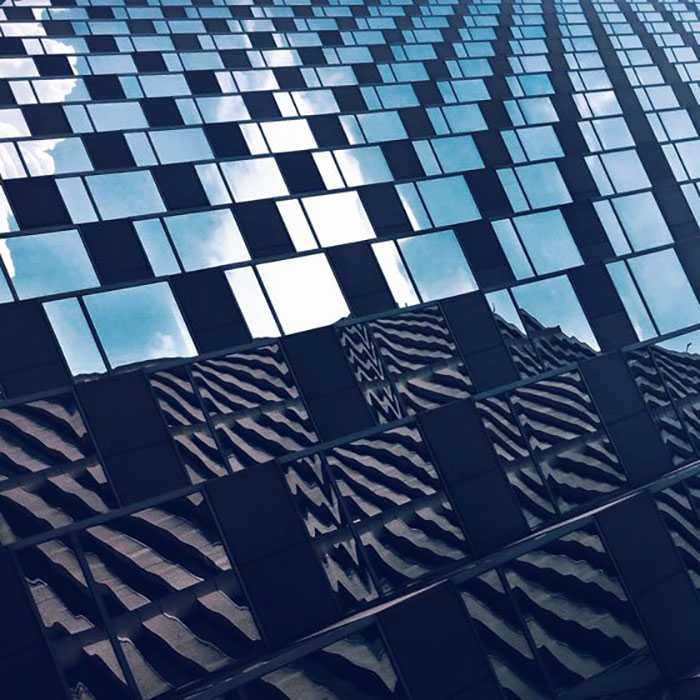
Play with reflection
It is pleasing to the human eye to see reflection; So look for an opportunity to play with reflection in your images. You will find various points of reflection, such as large bodies of water, mirrors, sunglasses, drink glasses, and metal surfaces.
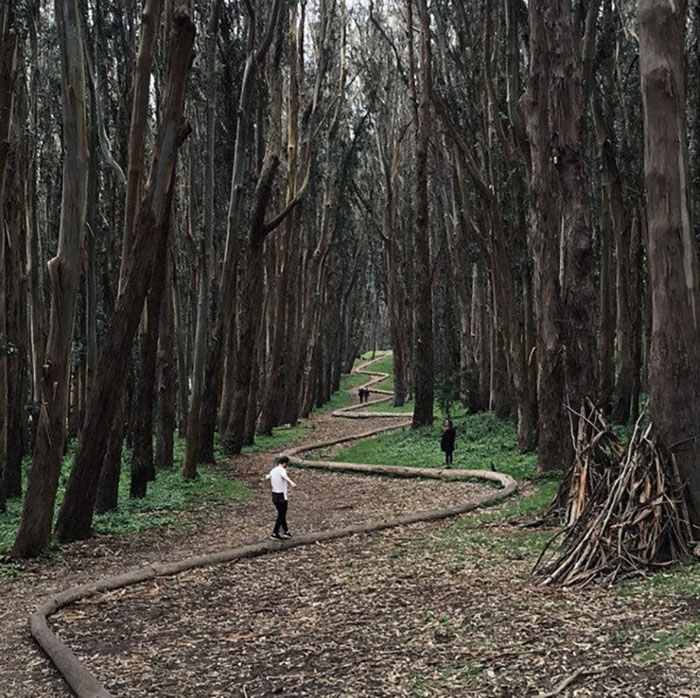
Use guidelines
In some images, some lines draw the viewer’s eye to a specific part of the image. These lines are called guides. These lines can be straight or circular. Examples of guidelines include stairs, building facades, train tracks, roads, or even forest trails. Guidelines are a good feature to create a sense of depth in the image.
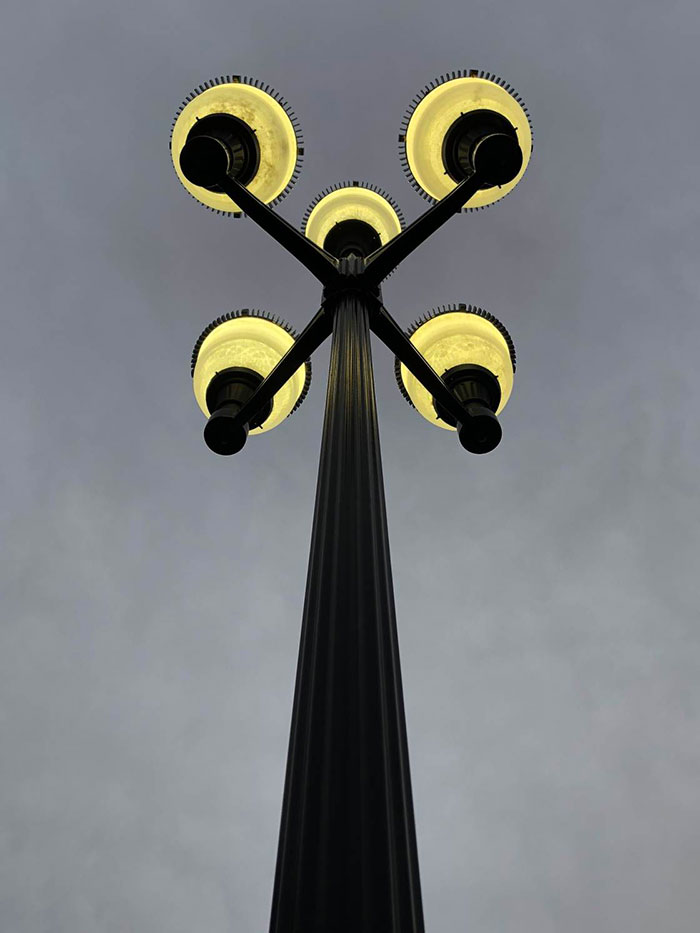
Search for symmetry
Symmetry can be defined as beautiful and harmonious proportions and balance. The images are symmetrical and pleasing to the eye. Also, creating symmetry is one of the simplest and most attractive ways to combine images. In photography, symmetry means achieving an image that can be divided into two equal parts; So that the images are mirrors of each other. Symmetry is slightly different from reflection and can also be found in the wild. You can use the guidelines to create symmetry.
Search for duplicate patterns
Duplicate patterns are also pleasing to the eye. These patterns are obtained by repeating graphic elements such as lines, geometric shapes, shapes, and colors. These patterns can have a dramatic visual impact, and photographing something like a beautiful, tiled bed is enough to produce pleasing images.

Avoid excessive magnification
When shooting from a distance, you are tempted to increase the magnification; But it is better not to do this; Because magnification leads to images full of noise and blur. Instead, try to get closer to your subject; Unless the subject is a wild animal.
Record small details
Close-up images with small and special details can make the content of your photo attractive. For details, look for textures and patterns such as tiles, paving stones, and peeling paints.
Note: In your image editing application, use the Sharpen tool to increase the sharpness of image details. You can also use the Clarity filter in some applications.

Create abstract images
Abstract images are used to capture the nature of objects or a collection of them and do not represent the whole landscape. Better yet, they only serve the purpose of creating unique subjects. There are two ways to create abstract images: Cut the abstract part of the normal image; ۲. Approaching subjects to record their abstract parts. To create this category of images you can use patterns and repetitions in the direction of the guidelines.
Mobile lighting
One of the basics of photography is the correct understanding of lighting. Today, smartphones provide users with many possibilities to adjust the light. These settings are much easier to work with than DSLR camera settings. Usually, just a click of the shutter button is enough to set the correct lighting; But sometimes the shooting environment is too dark or too bright; Especially if part of the image is darker or lighter, the result will not be satisfactory.
To adjust the brightness on many smartphones, simply tap the subject area on the smartphone screen to have the phone’s camera adjust the brightness automatically; But by making more settings in the Settings section of the phone, you can also change more advanced options such as ISO or shutter speed. Here are some tips to help you get the most out of your camera and use natural light to get the most out of it:
- Use window light
- Fixed direct sunlight problem
- Maximum use of the golden watch
- Use the blue clock to convey a sense of sadness
- Balanced lighting on cloudy days
- Creativity with the phone flash
- Long exposure photography experience
- Adjust the camera light in Manual mode
Use window light
The smartphone flash is not accurate and does not produce a smooth image; Especially if the subject is close to the lens, the light shines directly on the subject, making it flat. The cheapest and fastest way to capture beautiful images is to use window light. If possible, do not use direct sunlight. Scattered and soft lights can improve the subject’s lighting. The easiest way to do this is indoor photography; As a result, it is enough to place the subject in a room with proper lighting.
Fixed direct sunlight problem
Shooting in direct sunlight often reduces the quality of the photos. Apart from bad shadows, dim lighting can spoil the shadows of the image; But sometimes this problem is inevitable. Photographic moments do not wait for good conditions.
The first strategy to overcome direct sunlight is to find shade. Shooting under the shade of a tree or building limits the direct and dim light of the subject. If you have to shoot outdoors, do so after 12 noon; Because at this time, the sun is at the highest point of the sky and produces the worst light. Wait a while for the sun to go down and shine on the subject from a better angle. Another solution is to manually adjust the lighting of the phone. Do this every time you take a photo; Otherwise, you will lose a lot of details.
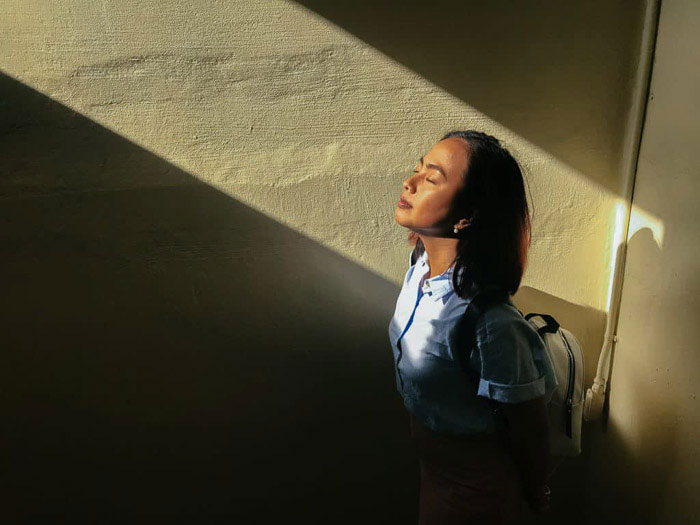
Maximum use of the golden watch
The golden hour is just after sunrise and before sunset. Light at this time has the best output for all types of photography. Light in a gold watch is ideal for portrait photography; Because it makes the skin glow. Also, the golden watch light is better for silhouette photography; Because the sun is at the lowest point of the horizon and produces natural backlight.
When the subject is illuminated from behind, a completely dark, shadow-like form is created. In addition, you can fully expose the model to direct sunlight to achieve the perfect silhouette. Due to the position of the sun in the sky at this time, long shadows have been created that increase the contrast and depth of the images. During sunrise or sunset, look for objects that produce abstract and dramatic images.
Use the blue clock to convey a sense of sadness
The blue clock occurs just before sunrise and after sunset. This time is short and everything turns blue at this time. The sun is slightly below the horizon. The light at this hour may not be as bright as the golden hour; But again, this would mean that you have to spend on these processes.
Cold shadows on a blue clock are great for creating dramatic portraits. At this time, everything looks colder than the golden hour, thus conveying a mysterious feeling. The blue clock is also very useful for capturing landscape images; Because sunlight does not fill the frame with shades of orange and you can see more color in the sky.
Although the sun is below the horizon at this time, it produces red to purple lights and colors. This is a good time to photograph the moon and stars. The bad news is that smartphones do not allow long exposure of stars. In this case, you should use peripherals such as Camera + 2 to select slower shutter speeds. Depending on the ambient light, increase the shutter speed slider to 1/15 or less. You need a tripod to work at slow shutter speeds. Because the shutter is open longer, any movement can blur the image; As a result, it is important to keep the phone steady.
Balanced lighting on cloudy days
Cloudy days are a good place to take portrait pictures; Because clouds block sunlight and light scattering creates a smooth, even exposure; As a result, the images become studio mode. The best time to photograph on cloudy days is when the sun is high above the sky. At this time, you can use a lot of light that is scattered through the clouds; For this reason, you do not need to worry about shady blue lights before it rains. Try not to shoot when the sun is below the horizon or when the clouds are very thick; Because photography in these conditions leads to dark and blue images and gives them a sad state.
Creativity with the phone flash
Smartphone cameras perform satisfactorily in low light conditions; But if you are in a dark and isolated space with no light source around you, what is the solution? If possible, try not to use the phone light directly to illuminate the subject; Instead, ask a friend to hold your phone next to the model. In this way, the image will not be flat and uniform.
You can also use inexpensive side lighting equipment such as cheap LED panels. These panels are much brighter than the phone’s flash and can illuminate the subject from a little more distance. Use a tripod to avoid blurring the photo.

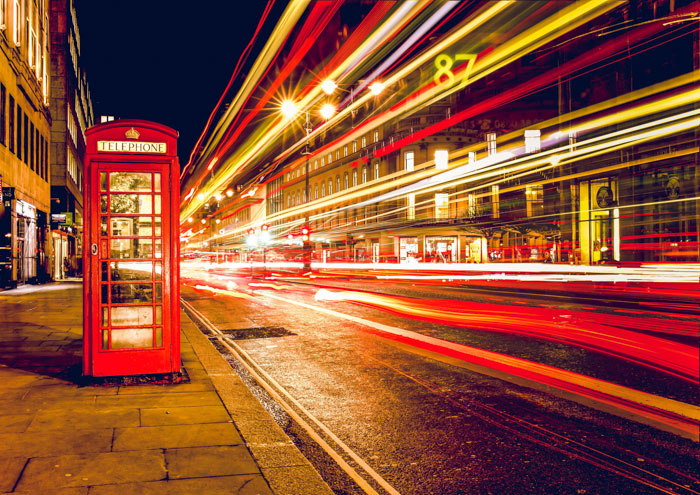
Long exposure photography experience
If the light source is around you, you can use the Long Exposure method; Like photographing the sky during a blue hour, you can use the Long Exposure to capture images in low light. However, you still need apps like Camera + 2 to make up for the shortcomings.
Although the sky seems dark to our eyes, it is never completely dark. You can create a beautiful image by opening the shutter and capturing the surrounding light. Just play with the shutter to get the right lighting. Depending on the darkness, you can change the shutter duration between 2 and 30 seconds.
Camera light settings in manual mode
The phone’s camera adjusts focus, ISO, aperture, and shutter settings by default; But in special situations where you need manual lighting, you can manually change the phone’s light settings by going to Pro mode and manual mode.
In Pro mode, you can control images or videos more. Adjust settings such as ISO and shutter speed and exposure levels manually and apply filters to your style, and adjust the white balance settings to suit different lighting conditions. Follow the steps below to access Pro mode on your Galaxy phone. Of course, keep in mind that these settings are similar to other steps on other phones:
- Open the camera.
- Scroll to the More section and select Pro Mode.
- Click on the existing camera settings and change them as desired. Here are some options:
- ISO: The ISO value adjusts the light sensitivity. Low values This option is used to illuminate static or bright objects, and higher values are used for dim or moving subjects. Be aware that higher ISO settings can cause noise in images or videos.
- Aperture & Shutter Speed: This option is used to adjust the shutter speed. Slow shutter speeds allow more light to enter the phone and make images or videos brighter. This option is suitable for night photography. Fast shutter speed allows low light to enter the camera. This option is suitable for capturing fast and moving subjects.
- Standard: This option is used to adjust the contrast and saturation of colors and opacity and brightness. In the next section, we will fully describe the final processing of the images.
- Manual Focus: In this section, you can change the focus mode.
- White Balance: In this section, you can select the appropriate white balance or color balance and adjust the color temperature.
- Exposure: Adjusts this value to determine how much light reaches the camera sensor. You can use more exposure for light situations.
Note: Some phones do not have a Manual Camera Mode; But do not worry, you can use the Camera Manual mode by installing additional applications.
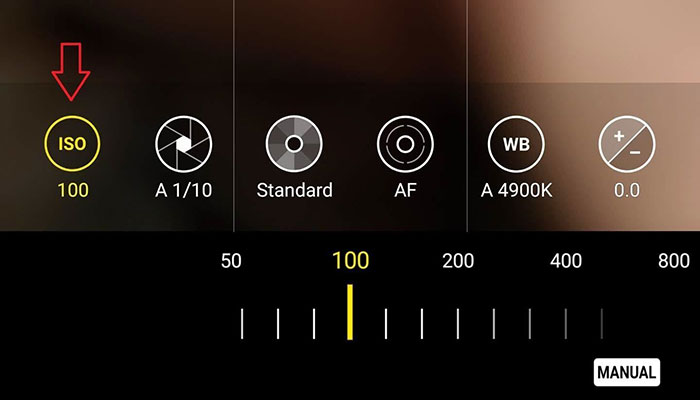
Image editing on mobile
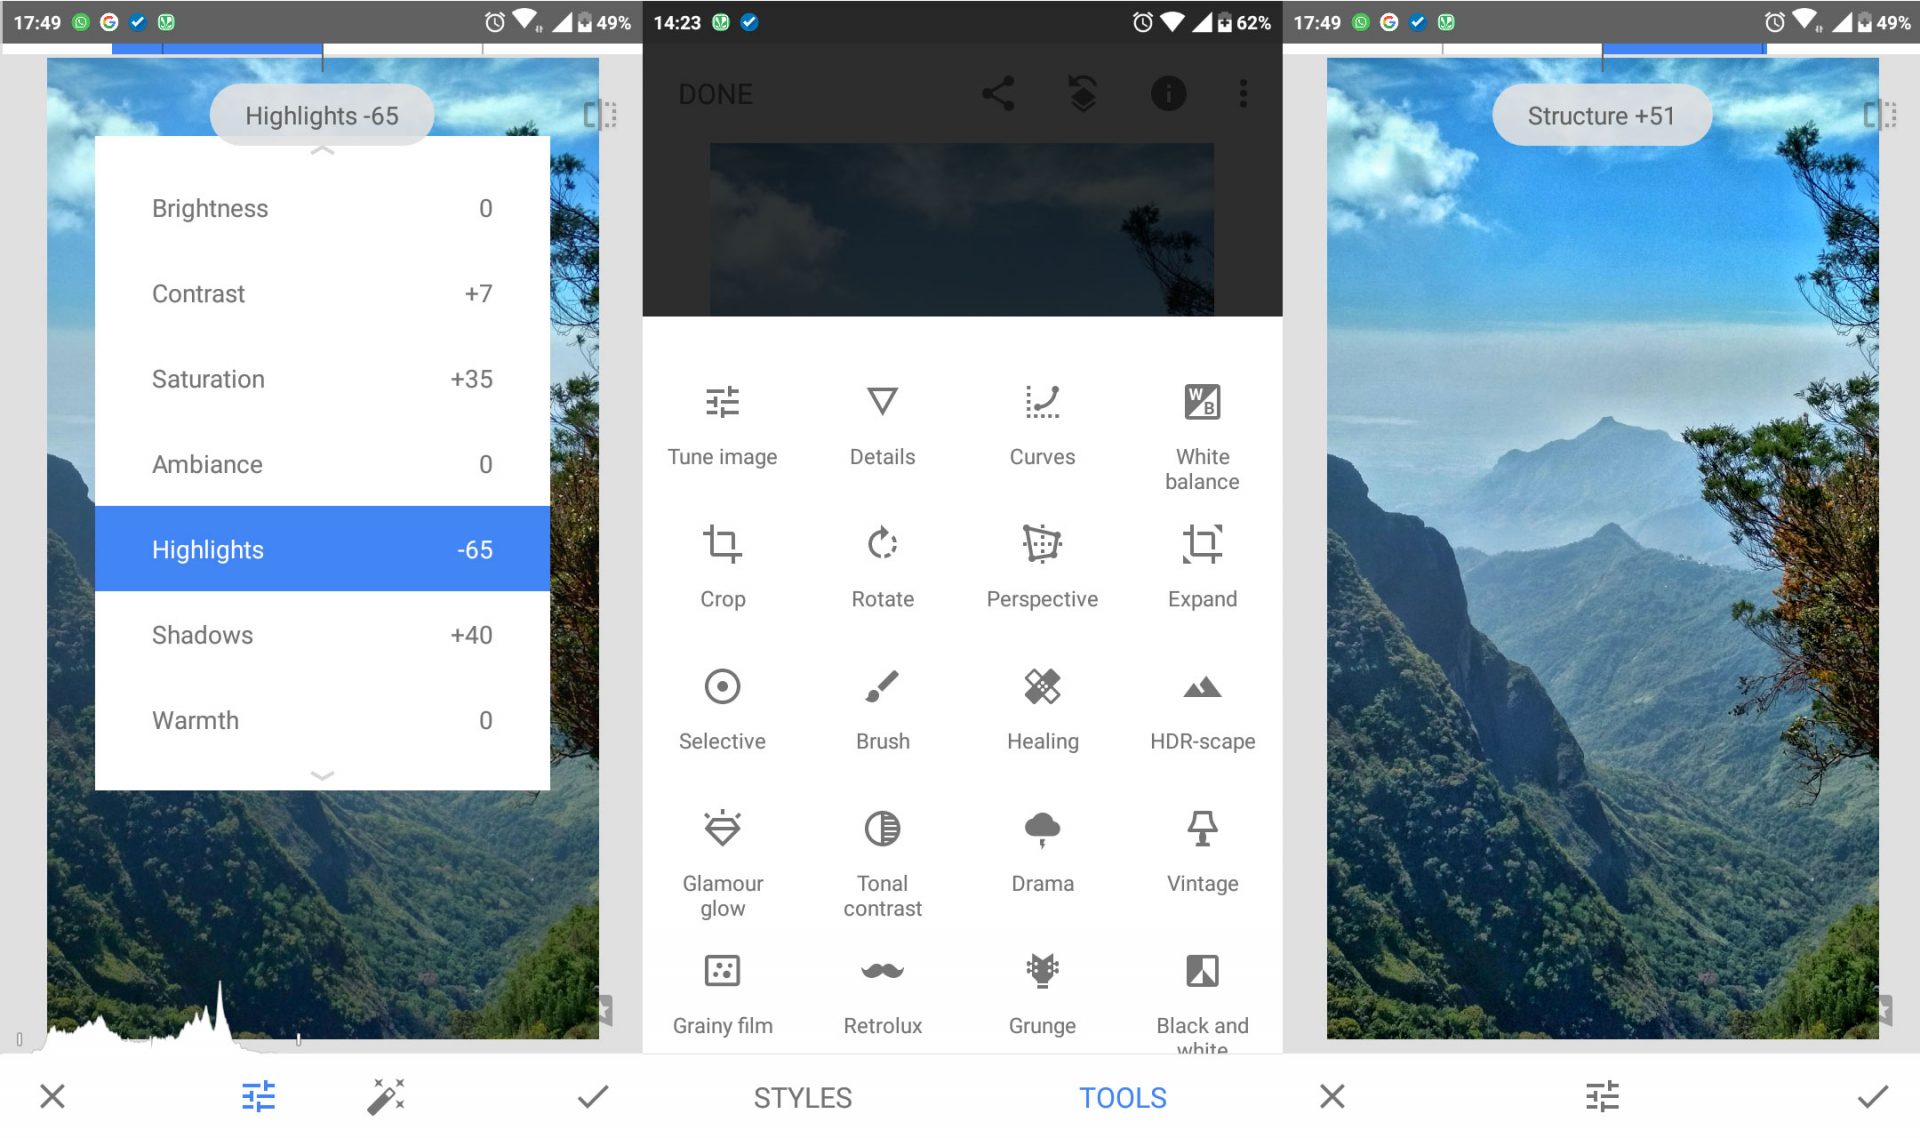
There are several image editing apps for Android and iOS. Continuing to work with Snapseed, we teach one of the most common image editing applications. This application has a very clean and feature-rich user interface. You can find similar settings in other applications. After installing the application, open the image you want in it and click on Tools> Tune Image. You can change several options in this section, which we describe below:
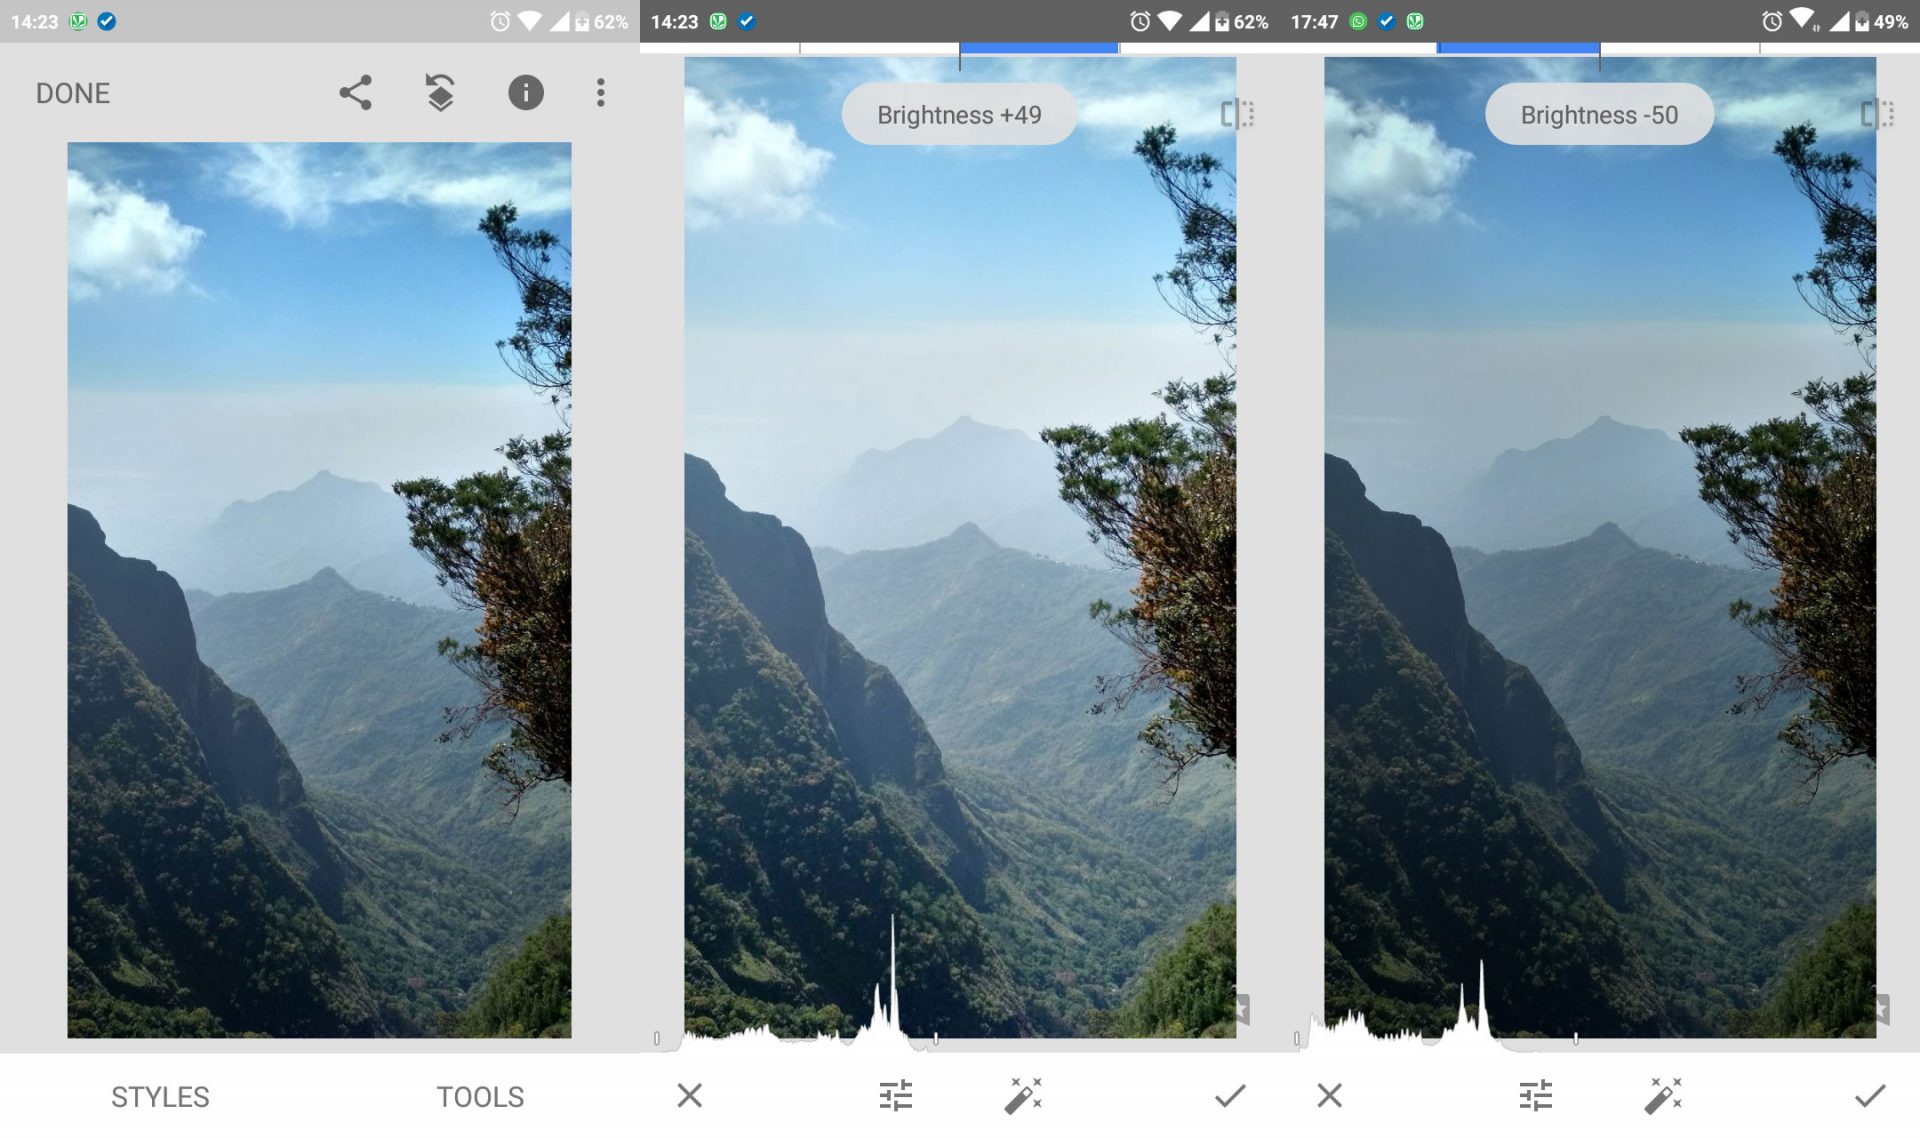
Brightness: This option changes the overall opacity and brightness of the image. By adjusting it, you can achieve a dark or light image. Use this feature when the raw image is too bright or too dark.
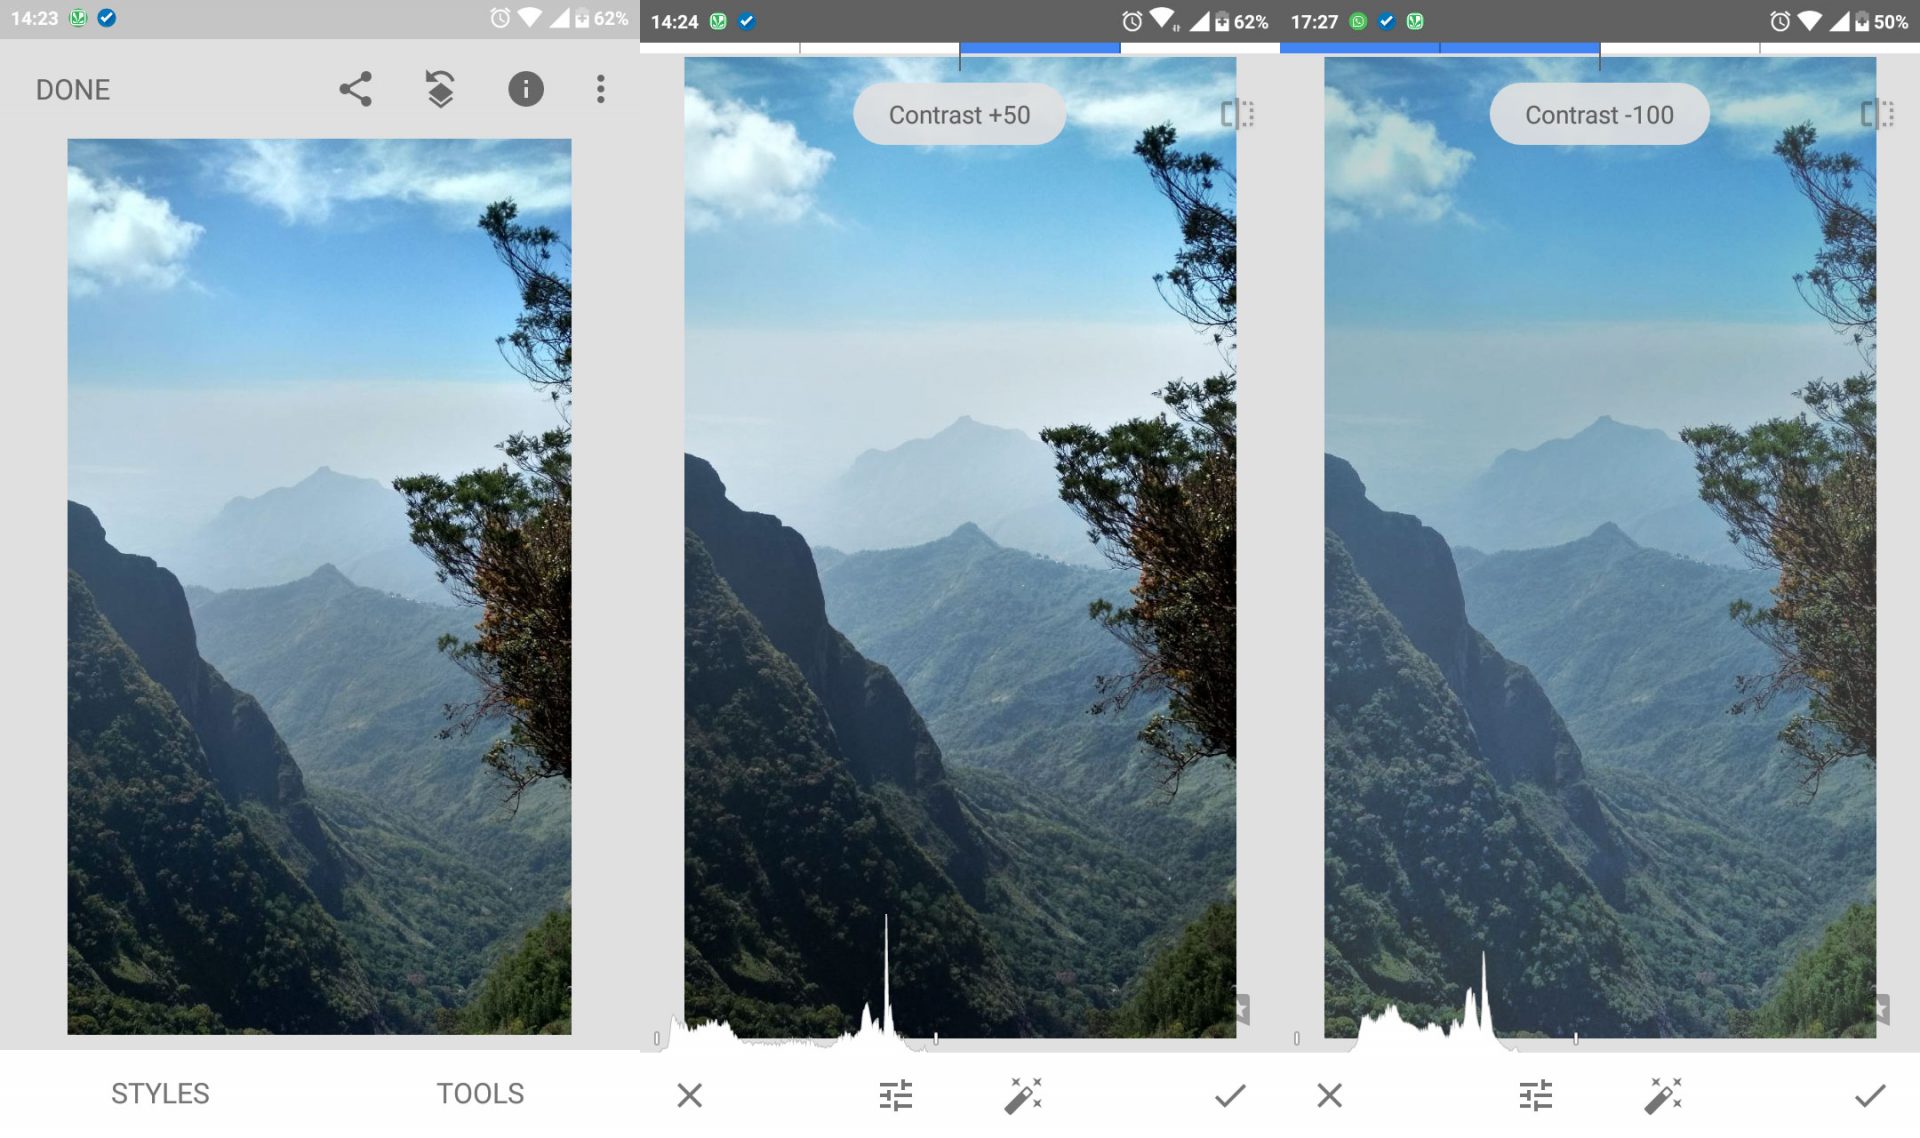
Contrast: Contrast is the difference in color and brightness that differentiates the subject. As you can see in the pictures below, increasing the contrast leads to increasing the resolution between the dark and light parts of the image, and decreasing it results in the opposite result.
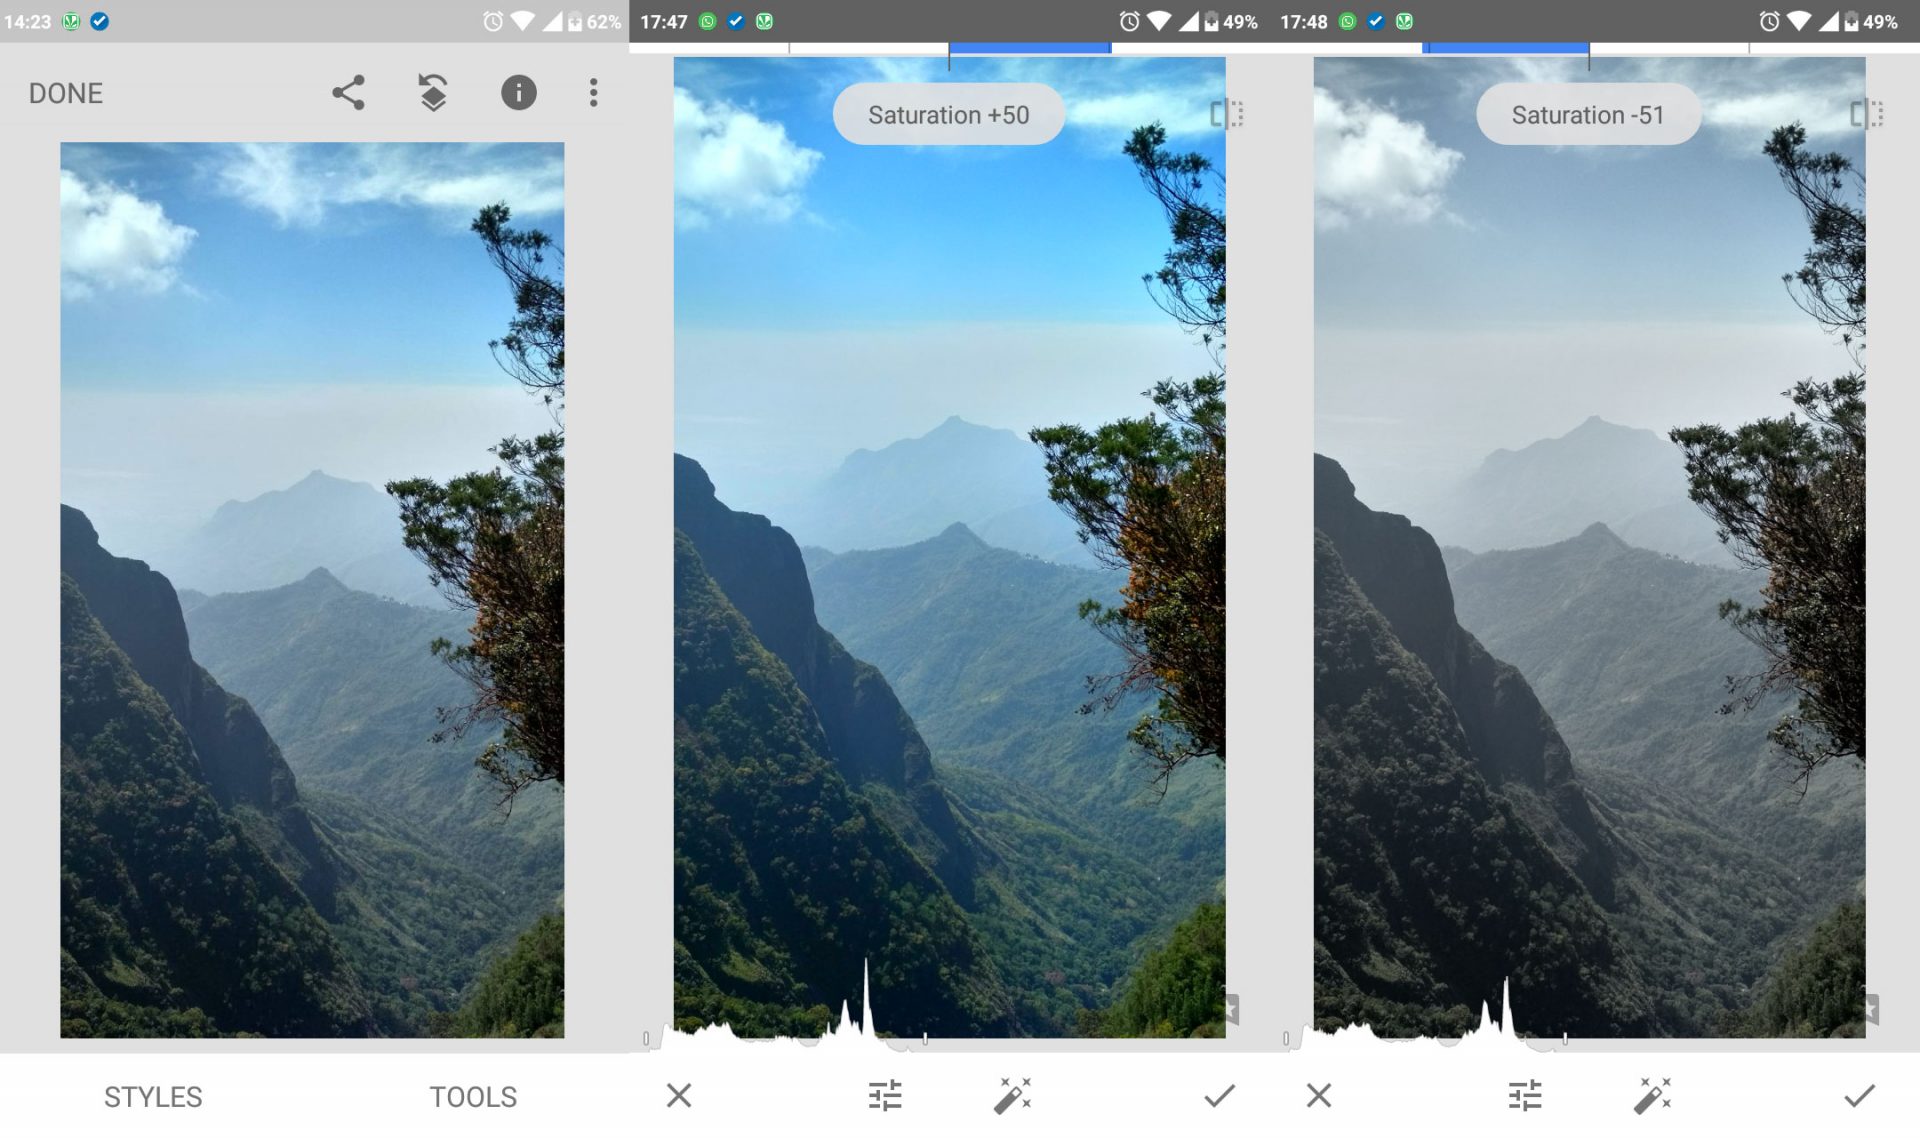
Saturation: Saturation is the amount of white light combined with color (the predominant color seen with the naked eye). Increasing color saturation leads to increased color separation.
Highlights: Highlights are bright components of the image. By changing this option, you can change the intensity of the bright areas. Do not confuse this feature with Brightness; Because Brightness is applied to the whole image; Highlights, on the other hand, change only certain parts of the image. In the image below, you can see how the hills have become more distinctive as the Highlights decrease.
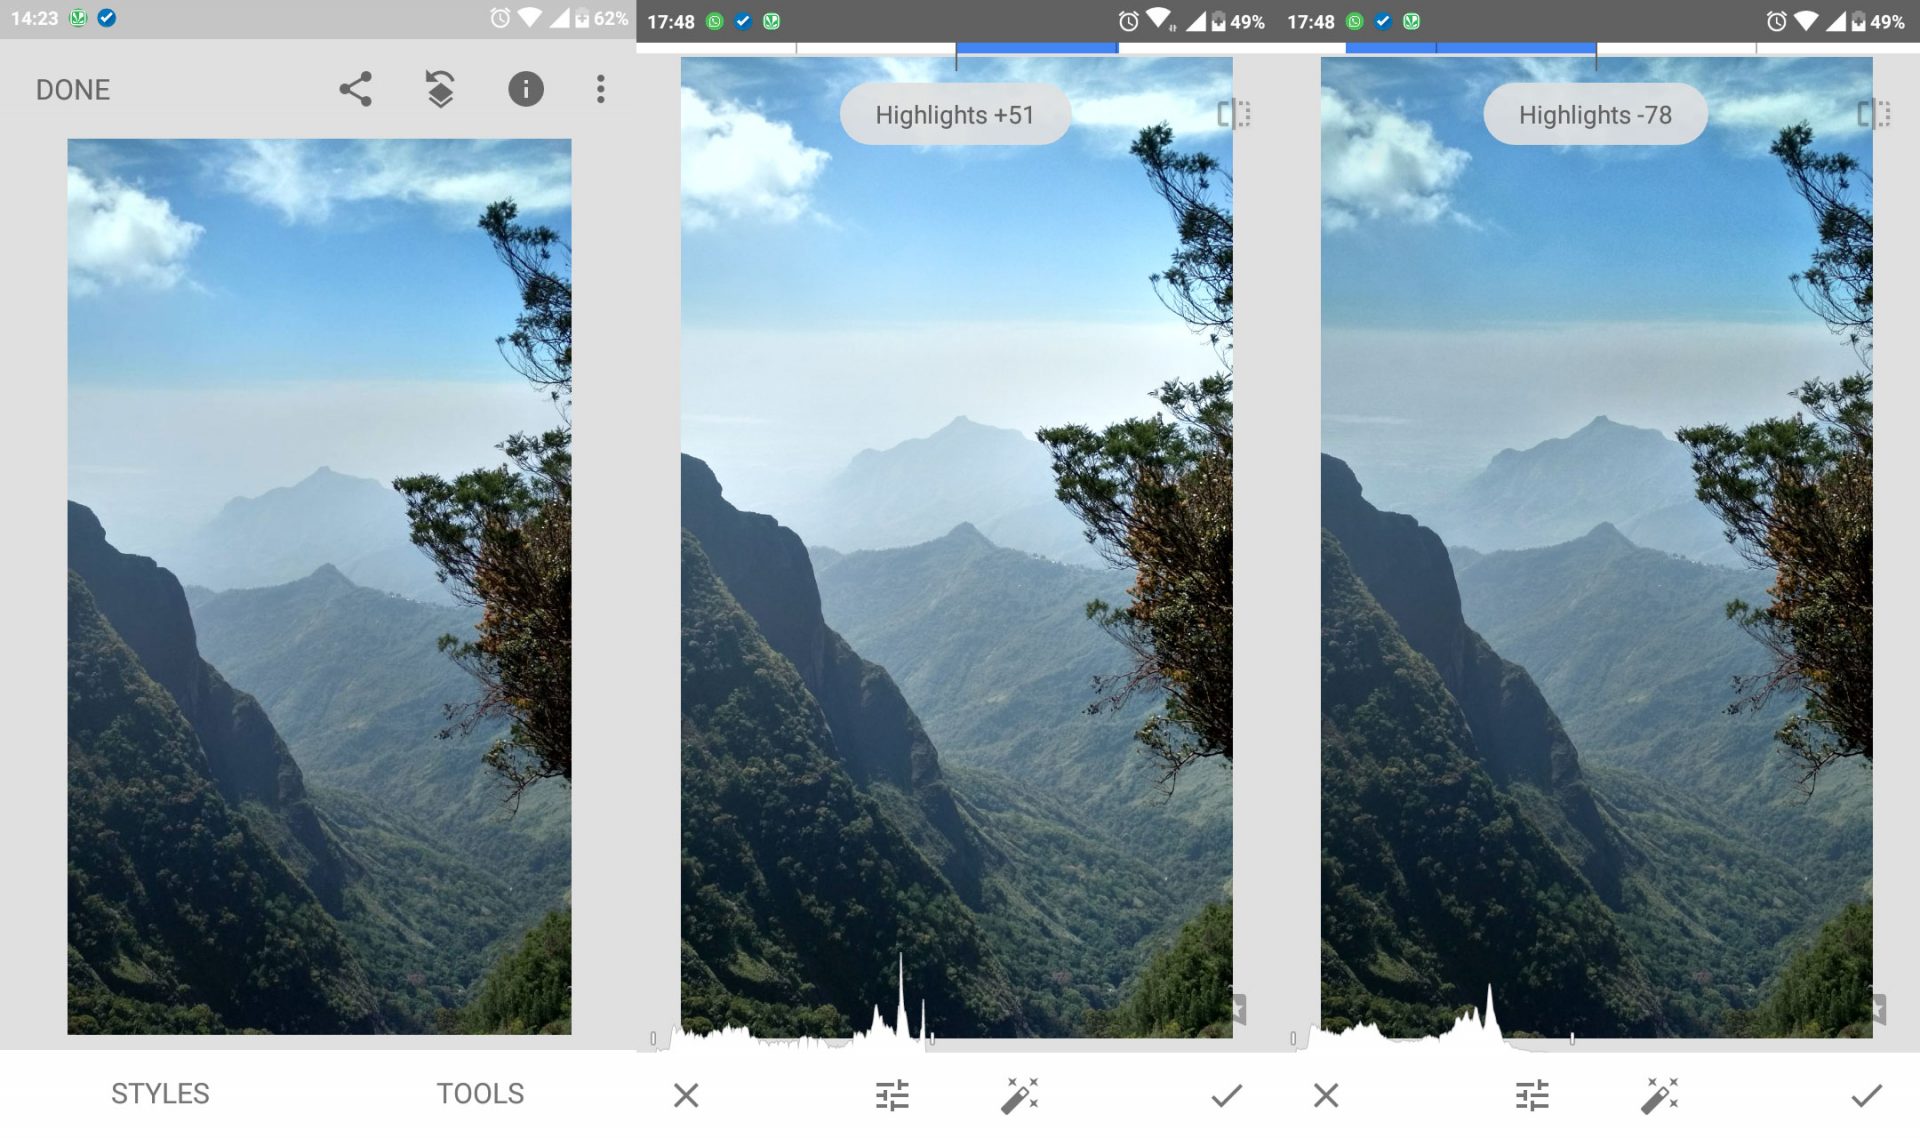
Left: main image, center: increase in highlights, right: decrease in highlights
Shadows: The shadows are exactly opposite the highlights. By increasing the shadows (Shadows) dark areas are marked. The excessive increase of shadows can lead to increased noise; Because the image does not contain much information at the point of shadows.
Note: Use this feature if your camera supports RAW shooting and records a lot of information (such as image information in shadows and highlights); However, it increases the file size (as much as five to six times or more).
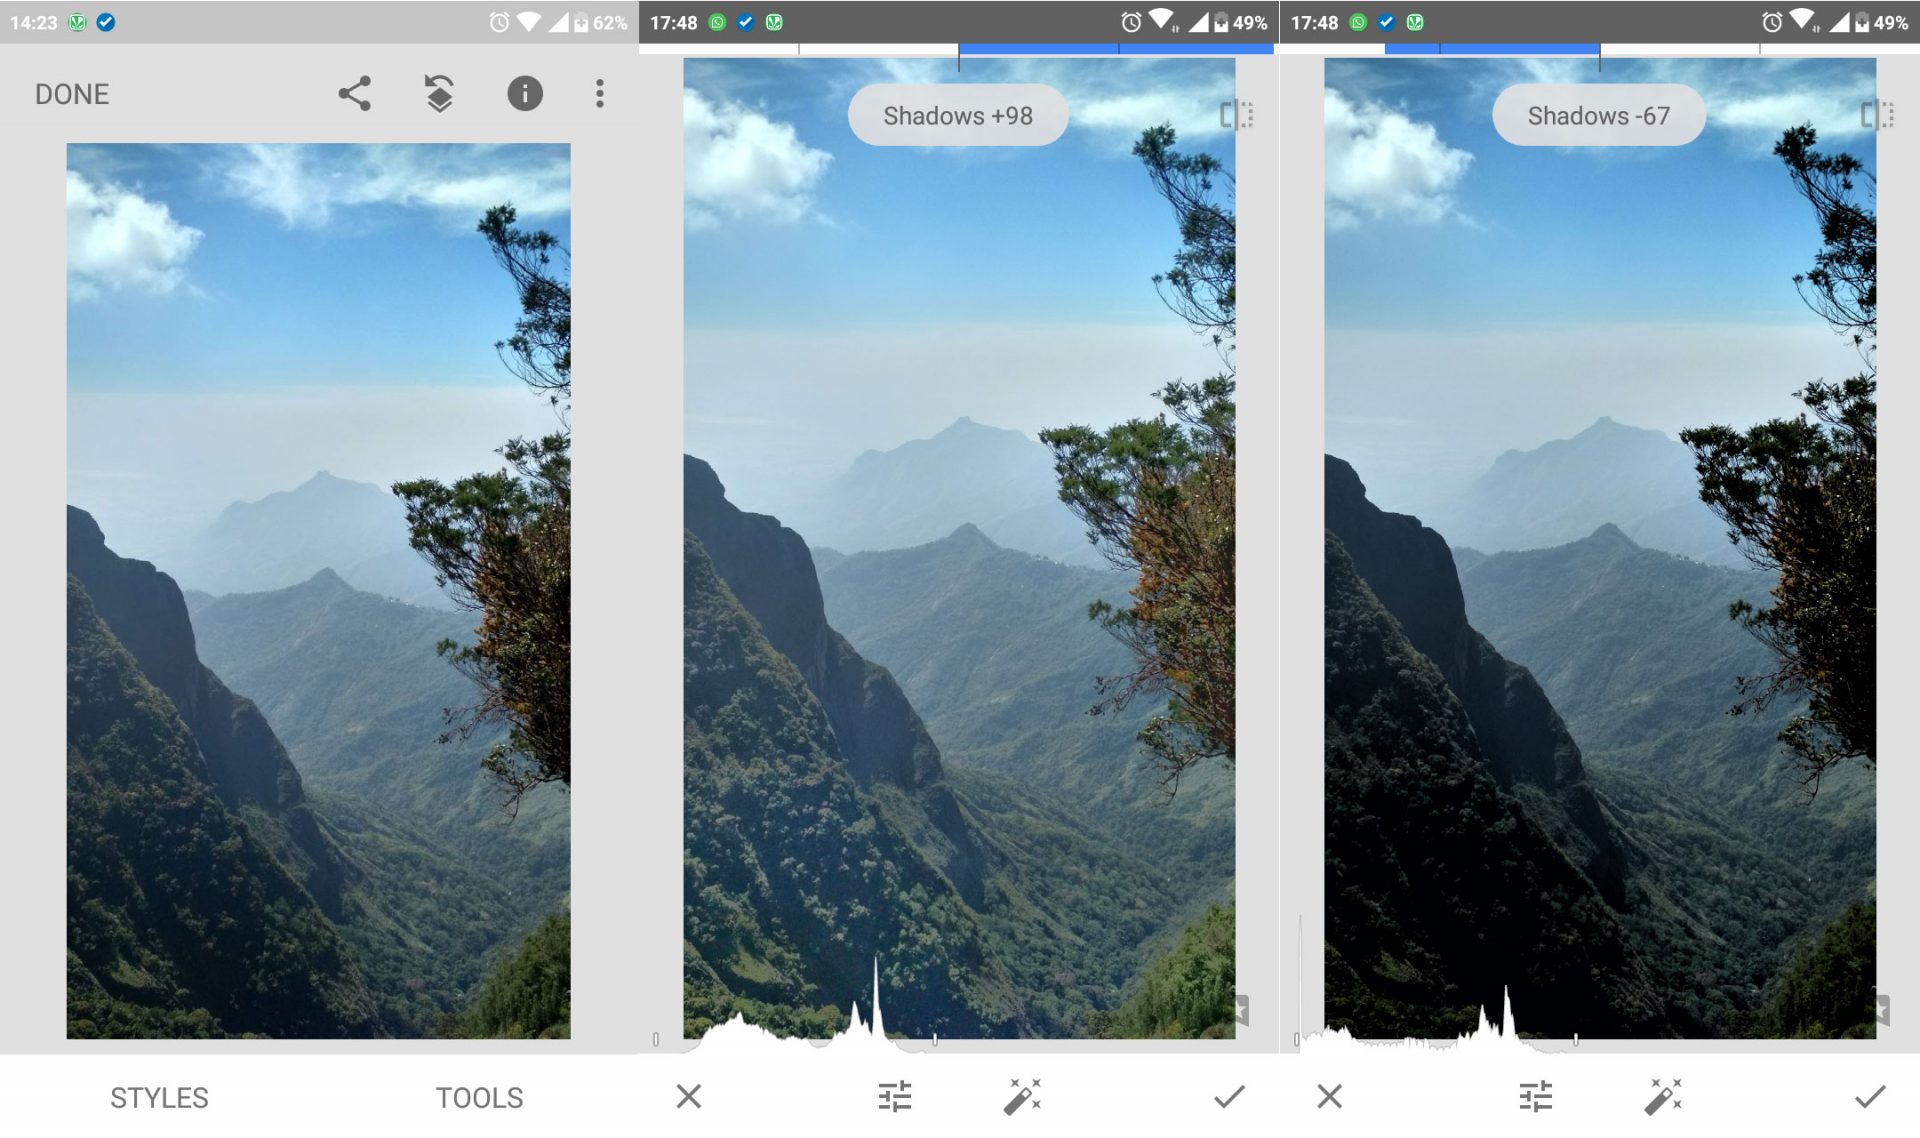
Left: main image, middle: increase shadows, right: decrease shadows
Warmth: This option is used for the temperature of the image. The warmer the image, the more orange and yellow shades are seen (such as near sunset) and the less heat (Warmth) means cold and blue shades.
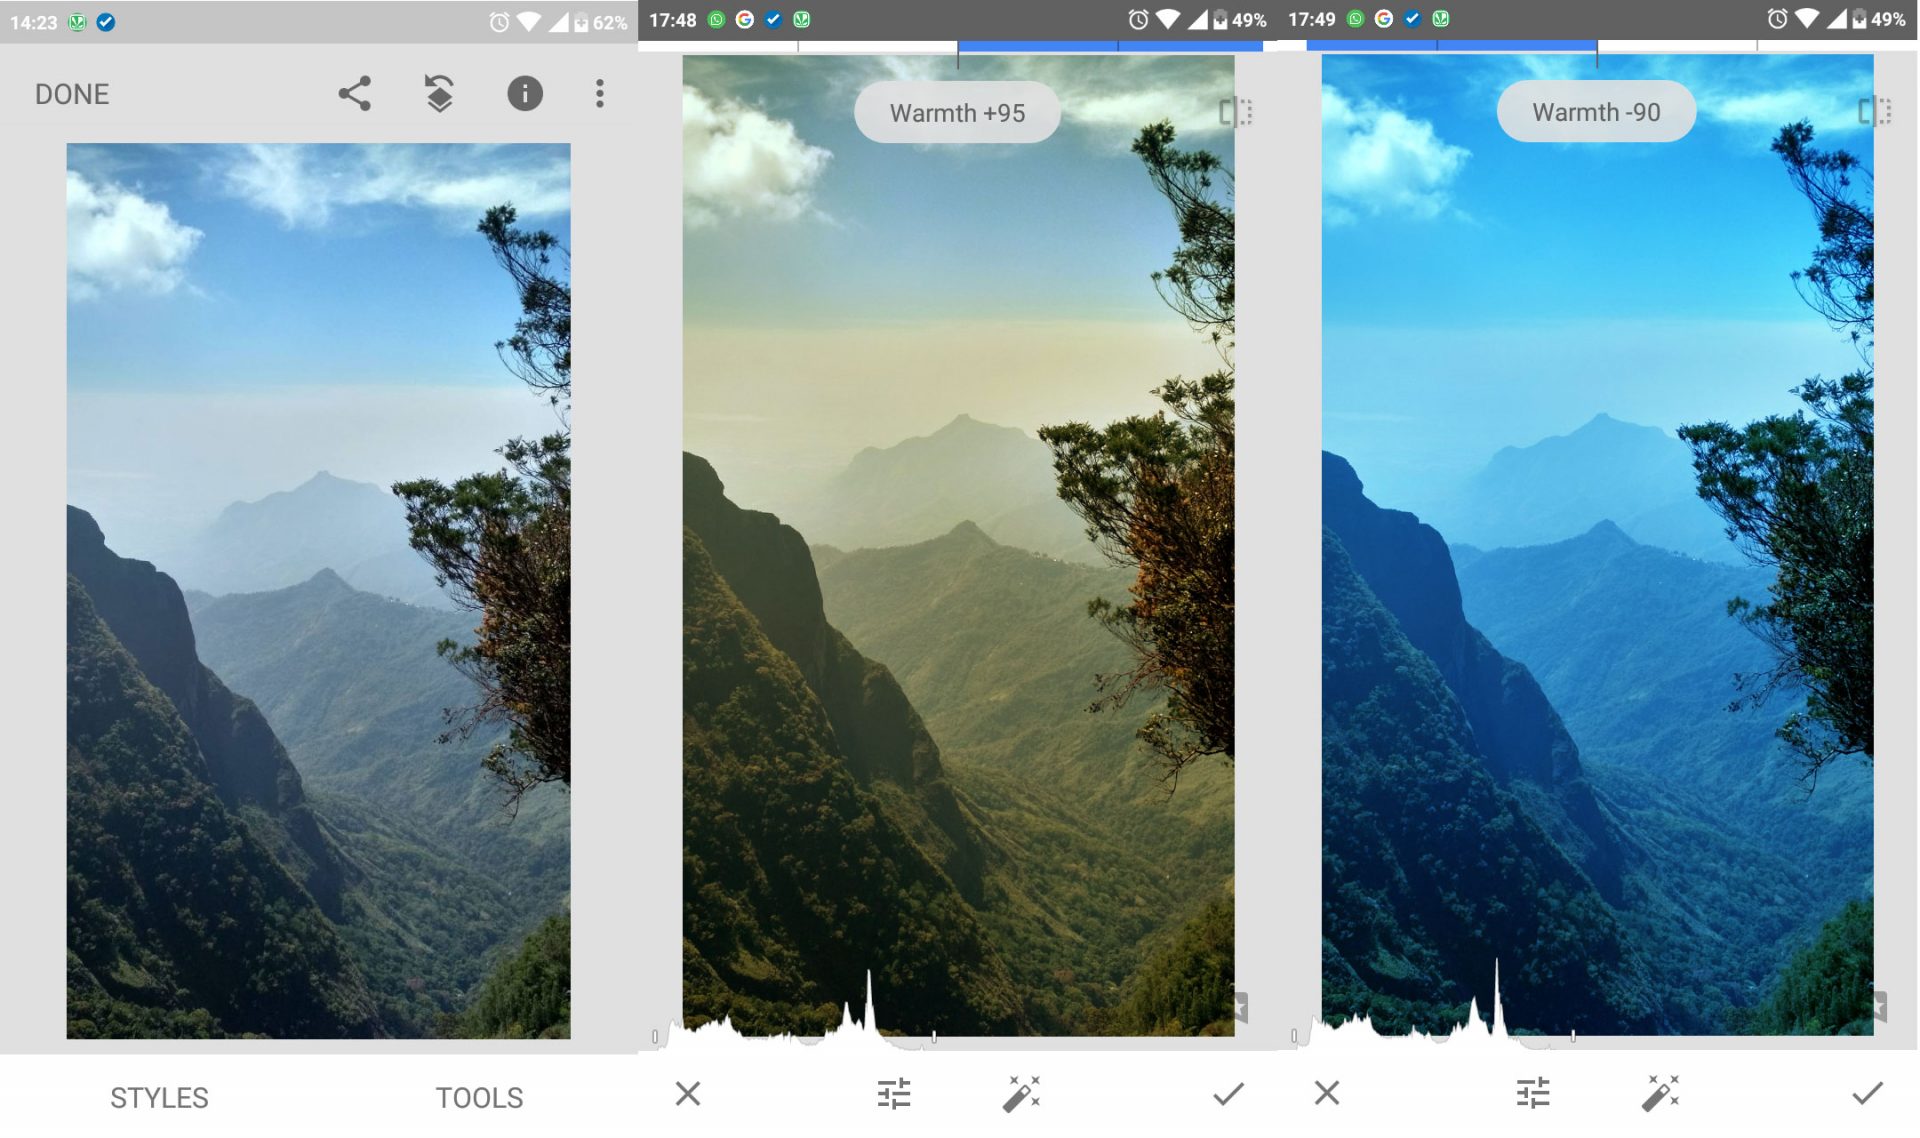
Left: main image, middle: increase warmth, right: decrease warmth
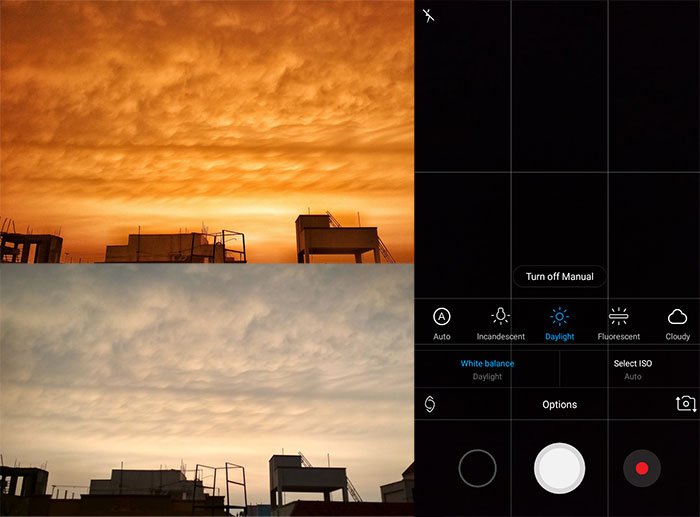
White balance: White balance is one of the features used to make a photo look natural. Theoretically, the camera often adjusts the white balance correctly; But sometimes the true light shade of the image may not be recorded. For example, consider the images below. The sky is actually like the image above (the photo is recorded in Manual mode with Daylight White balance settings), But the Auto mode captures the camera image below to make it look more natural. To avoid this, change the white balance. You can find this feature in Manual mode.
Edge Enhancement: Now we refer to another feature of Edge Enhancement. To do this, go to Details (triangle icon). This section contains two parameters: Structure and sharpness. Both parameters are Edge Enhancement algorithms. Structure Increases the sharpness of the image and its sharpness. Try not to use these two parameters too much.
Note: For iPhones, you can use applications such as Halide, Manual, VSCO Cam, or Hydra. The variety of image editing applications is huge and they all have almost the same features.
Additional Tips
In addition to paying attention to points such as composition, lighting, and image editing, it is necessary to follow other points that help improve the quality of photography.
- Buying a mobile tripod: Although mobile phones can be easily moved around, you need to avoid hand-shake for some images. In this case, you need a tripod to maintain balance. Most tripods are larger than the smartphone itself and can be bent at any angle.
- Do not be afraid to edit images: Combining, composing, and capturing images is the first step to creating attractive images. The next step is editing. Filters can be a valuable photographic tool. Do not be afraid to edit images and use image-editing applications to create attractive images.
- Keep your lens clean: One of the problems with a smartphone is keeping your lenses clean. Phones stay in the pocket or bag for a long time and are used in different weather conditions; As a result, dirt or fingerprints on the lens are common problems with smartphone lenses. So try to clean your camera lens regularly with a soft cloth. Soft cloths for cleaning glasses are a good option for this.
- Do not be afraid to make mistakes: Remember that the screen quality of many smartphones is not as good as the computer screen; As a result, transfer your images to a computer after shooting. Sometimes you even find that blurry and noisy images are aesthetically satisfactory and should not be removed.
- Use a wide lens: You can also use a wide lens for your phone. These lenses range from Fisheye to Wide lenses. These lenses can help increase the quality and professionalism of your images.
Concluding remarks
Today, almost everyone uses smartphones equipped with quality cameras. In practice, smartphones do not reach the level of professional cameras; But professional images can be achieved by observing some tips and applying some settings, as well as using side applications, and greatly improve the quality of images; In such a way that the output of some images is equal to the output of professional camera images in terms of aesthetics and observance of technique.