


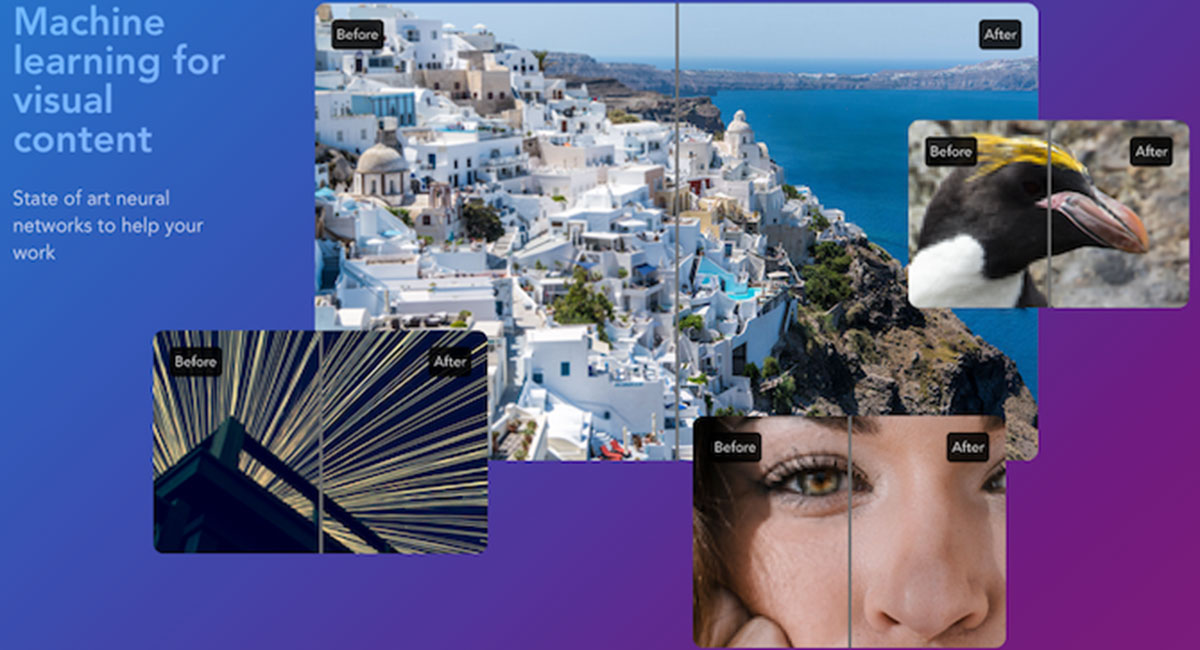
How To Increase The Quality Of Images With Different Methods
Most Likely, You Are In A Situation Where You Like The Image, But Its Quality Is Low. You Can Not Even Print These Images; Because With Low Resolution, They Can Not Have A Beautiful Effect.
Increase The Quality and Image resolution is one of the most important parts; it controls the quality of the photo.
In this article, we will teach you the best ways to increase the quality of images so that you can see your favorite photos with better resolution.
What is the resolution?
Resolution is a broad term and can be used in different fields of technology with different meanings. In the computer and media industry, resolution refers to the resolution of the display and the number of image elements (pixels or dots) that can be displayed horizontally and vertically by a display.
Resolution is a measure used to describe the sharpness and clarity of a photo. This method is often used as a yardstick for judging the quality of monitors, printers, digital images, and other hardware and software technologies.
The term is common in the smartphone world to describe the quality of a device’s display and the media to describe the visual quality of movies. This phrase is also used to determine the resolution of a screen, monitor, or TV. Resolution is also referred to as screen resolution.
Photo resolution Increase The Quality.
Photo resolution is the detail that an image has. The term is used for digital raster images, movie images, and other types. Higher resolution means more detail in the image.
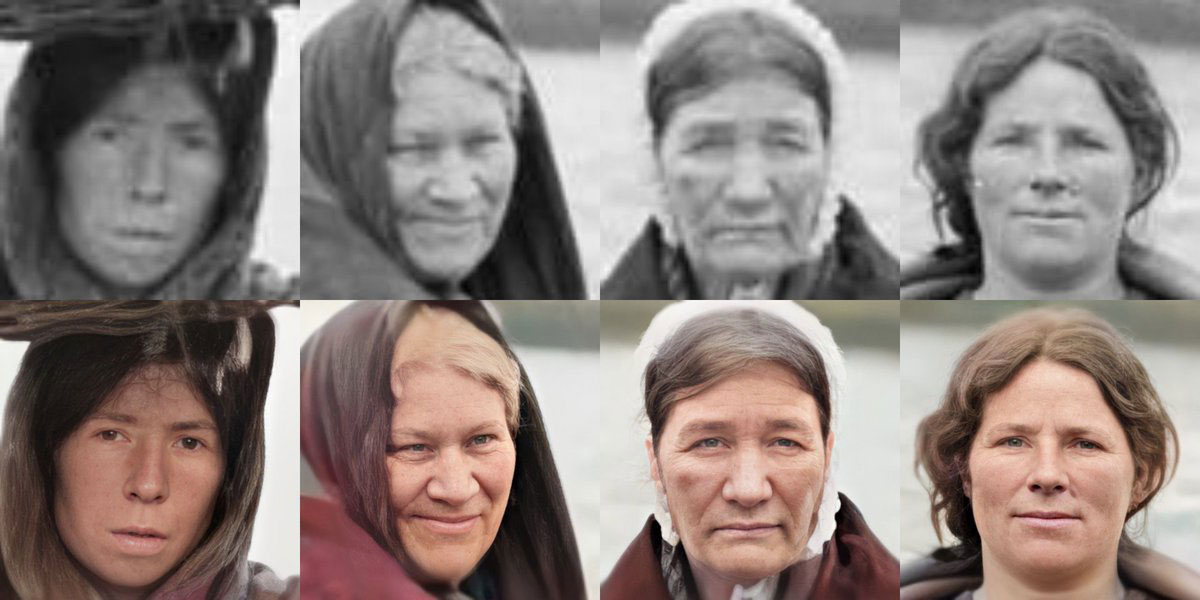
Image resolution can be measured in a variety of ways. Resolution determines how close the lines are to each other and how visible they are. Resolution is the finesse of detail in a bitmap image and is measured in pixels per inch (PPI). The higher the number of pixels per inch, the higher the image resolution. In general, a higher resolution image produces better print image quality.
Increase The Quality of Photo On Android and iOS
It seems that today’s smartphones can almost completely replace cameras. The cameras of today’s phones are so good that you do not need a special device to take pictures. Several apps now help you capture the best image, But we can not always record the moments as we want; Sometimes, an image may be blurry, damaged, or even poor quality.
Some special apps and services help you quickly improve the quality of your photo. In the following, we will introduce the top 9 Android and iOS applications of 2021 to increase the quality of photos.
Pixlr
Fans of high-quality selfies and photos are definitely already familiar with the Pixlr app. In fact, Pixlr is a free and useful photo editor that lets you make your image more beautiful, vivid, and sharper.
But the original image you are trying to edit may not be as great as you thought; No need to worry; Because now you can fix this with the app you have. Whether you are new or professional in photography, Pixlr gives you the tools you need and even offers image enhancement tips. In this application, you can easily improve the quality of your photo by improving the resolution, color balance, and adjusting shadows.
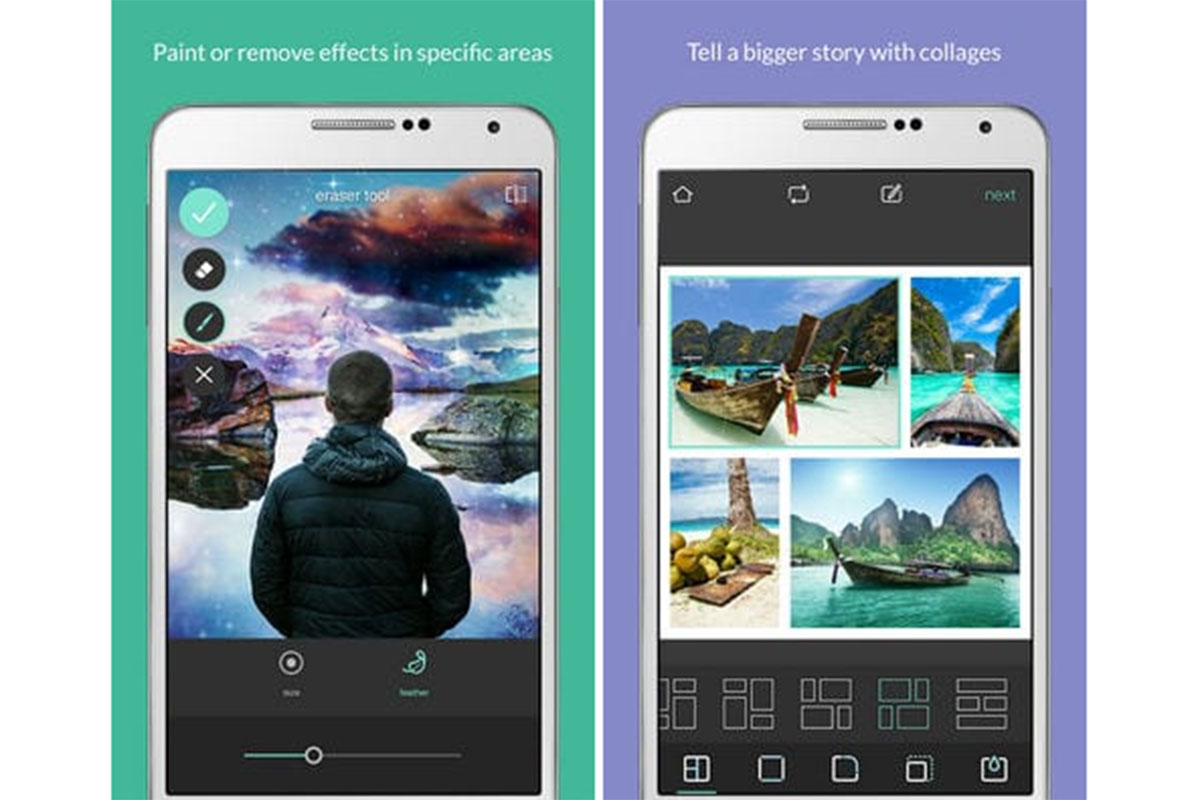
There are other features in this app; Pixlr lets you create a collage in seconds. The app automatically processes all available photos and creates a consistent color scheme.
Auto-correction functions make photo defects much easier for amateurs; So if you take a photo that you do not like the result, you can use Pixlr to enhance it.
AirBrush
AirBrush is another popular photo editing app. One of the outstanding features of this application is its extremely high score; Only occasionally is its performance in some areas considered insufficient by users, which developers quickly correct and improve.
With the AirBrush Editor, you get great results that are not even comparable to professional camera photography. If you do not believe that an application can fulfill all these great claims, it is better to download and install AirBrush.
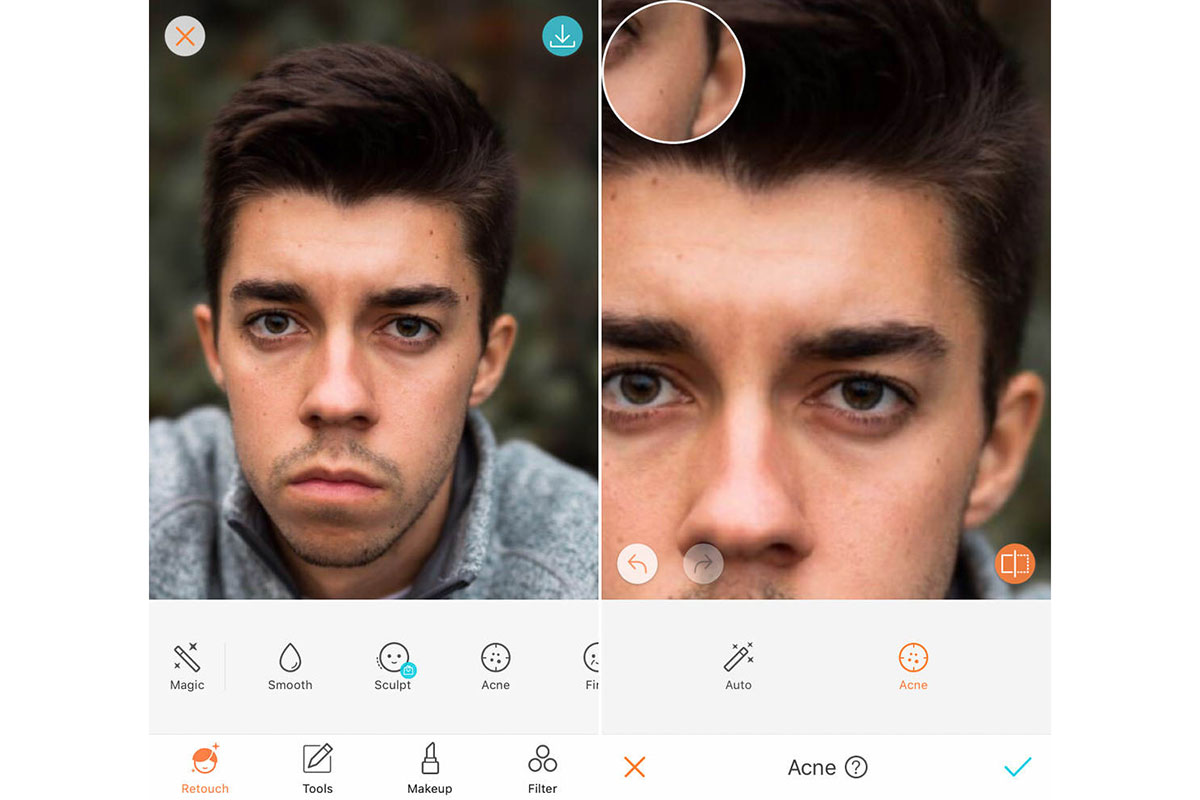
All the tools provided in AirBrush are quite straightforward. Almost always just control how much they use in the photo. When making changes, you can easily see the result and immediately evaluate whether the image looks like what you wanted.
Any defects you see in the photo can easily fix with the cleaning tool.
The professional photo effects provided by AirBrush really enhance your photos. You can do a lot with this app and its powerful tools, including the ability to add a black halo around the photo, remove unnecessary blur or even blur the background. This application can have a great impact on increasing the quality of your images.
Once you have a great result, you can immediately share it on social media with your friends.
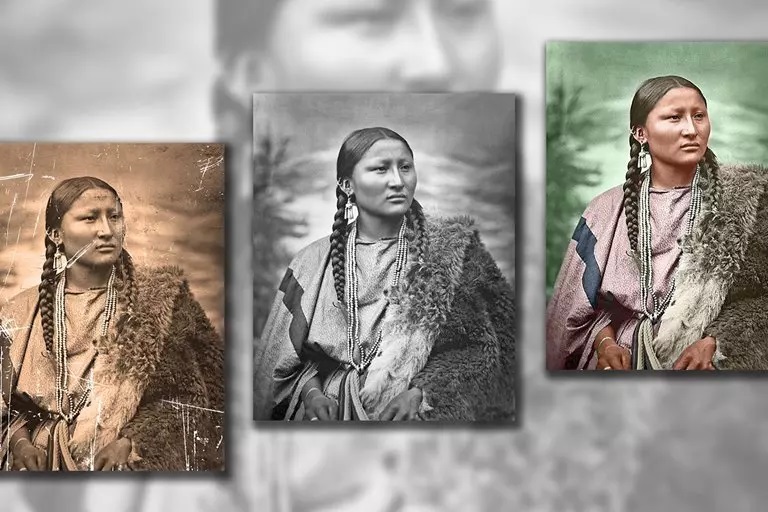
Remini
Remini can improve the quality of your photos instantly. This app is designed for this purpose. All the photos and videos you upload are processed to give you high quality and resolution.
Such amazing features make Remini truly unique; Because you can sharpen old photos and enhance your selfies.

Remini can work with digital versions of older photos; Which means that to enhance the quality of your old images, all you have to do is scan them or take pictures with your smartphone camera. You can also transfer old photos and videos from your previously used device to your current smartphone and see the result after the Remini process.
This application allows you to process your photos with artificial intelligence technology and get results such as drawings, high-precision photos, portraits, and more.
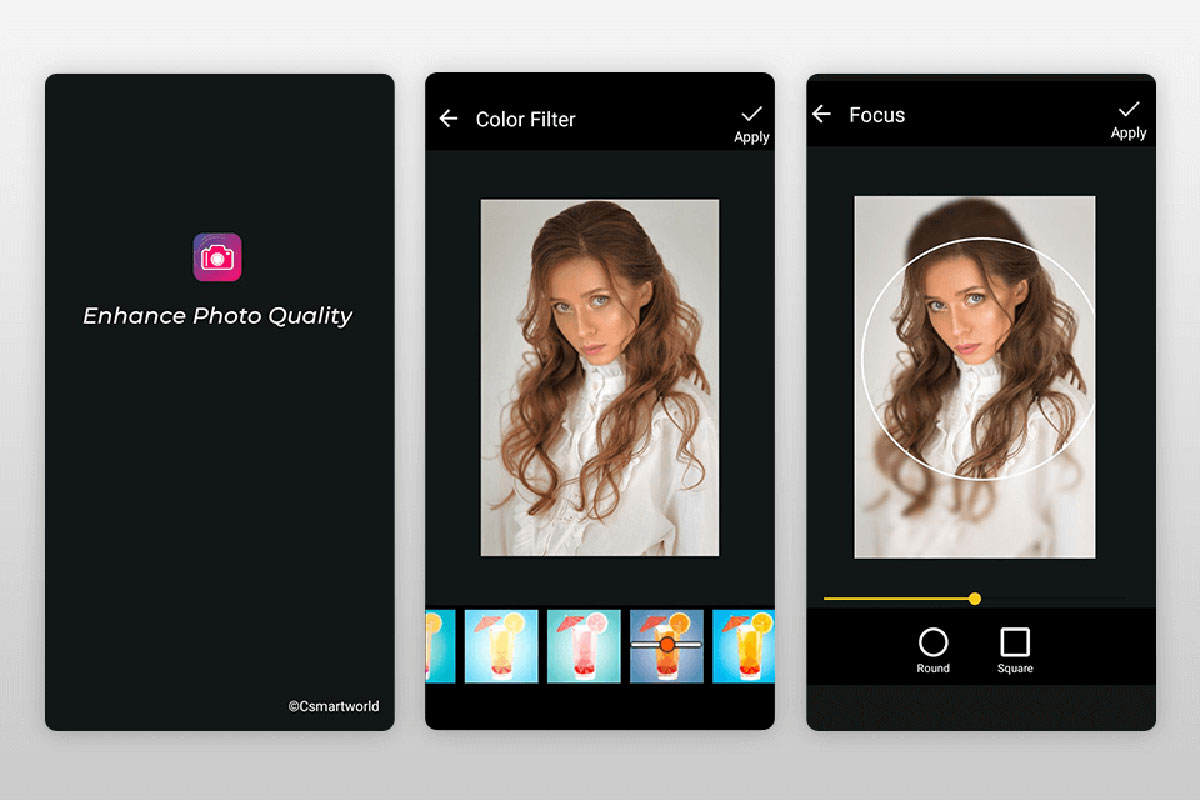
Enhance Photo Quality
The name of the app describes how it works, and it is impossible to disagree with it. Enhance Photo Quality has an apparent performance that all photography enthusiasts are in favor of. You can use it to improve the quality of photos and videos taken with your smartphone camera and edit your selfies.
Enhance Photo Quality and enhance the quality, and it offers you to add various effects to your image and increase its visual beauty. Various photography effects, holograms, and many other items are available in this application. Improved image quality is achieved by changing the brightness level, contrast, and color saturation. Enhance Photo Quality adjusts them to make the photo look realistic but very bright and beautiful.
Finally, you only look at the result of the operation performed by this application and, if necessary, make your own settings.
In Enhance Photo Quality, you can also apply a special color scheme to your image and use it to create attractive collages. You can use Focus Features to ensure full focus and sharpness in images. The application has the ability to share the final images on social networks immediately and even without leaving Enhance Photo Quality.
It is effortless to work with this application; Whatever you like to add to your image, from text to visual effects, Enhance Photo Quality easily enhances its overall quality. We suggest you download and install this application now.
Photo editor pro
Photo editor pro is an attractive app for iOS that, despite its simplicity, offers great features and capabilities. With it, while using various visual effects, filters, and many other tools, you will have the opportunity to improve the quality of your old photos and selfies.
This service is great for photo editing; Because you can really increase the quality without any damage. In Photo editor pro, you can edit different images from different categories such as food, landscapes, people, and more. Even photos taken at night or in a dark environment will be much clearer and better after processing.
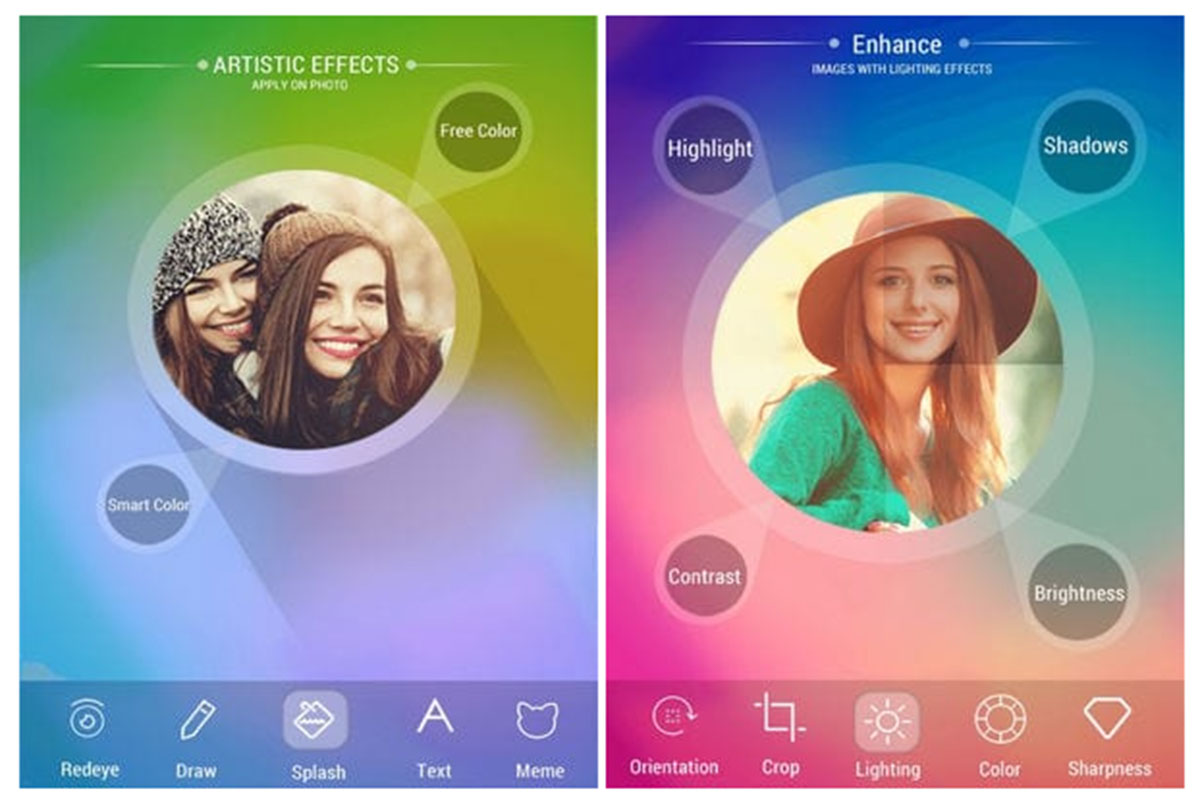
To show your creativity, you can add various elements to your photos, such as text and stickers. With this application, you can also improve the quality of images on the Internet.
Enhance it
Do you want to post a photo on social media or share it with your friends; But its quality is not high? Now it’s time to strengthen its quality! The Enhance it app removes image blur, removes unnecessary detail, and increases its resolution and detail.
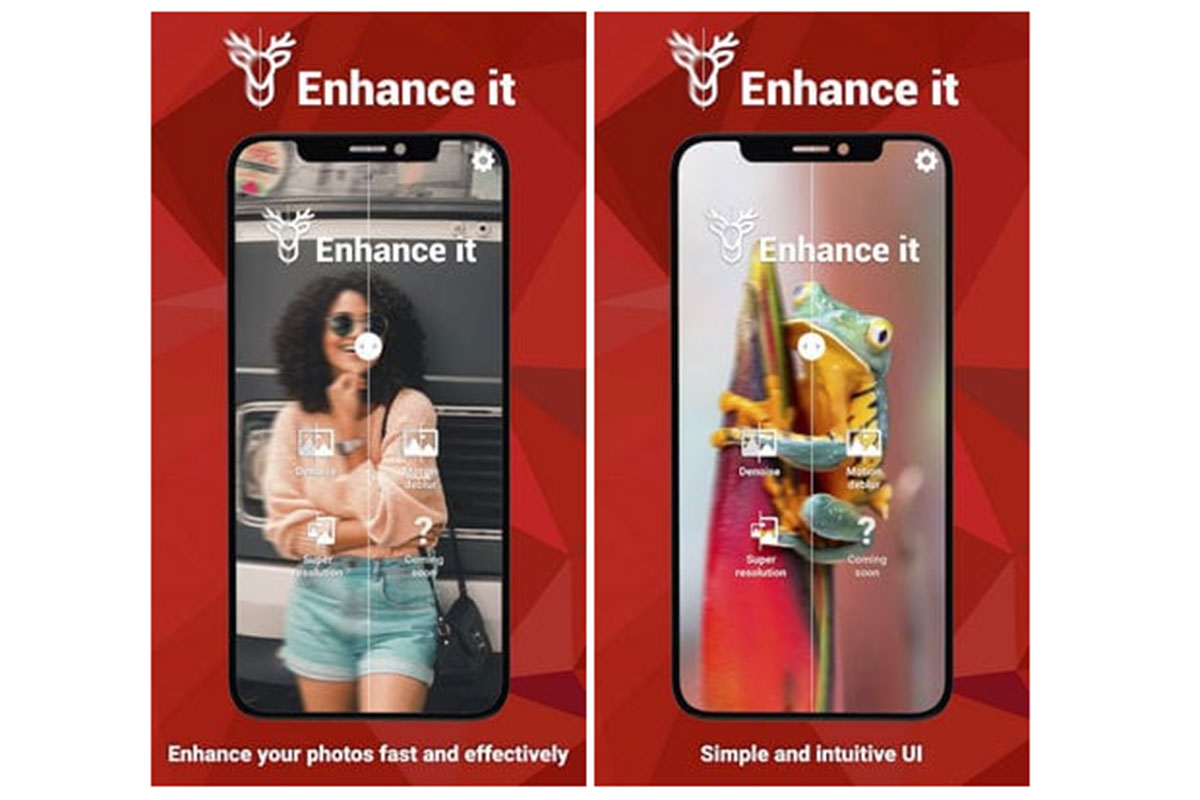
You can even enhance photos taken with your old phone with Enhance it and get rid of screen noise. The app can do this for all images, and you do not need to select specific photos. The Enhance it app lets you eliminate blur and noise in your images and make your photos clearer. You can also make certain colors that you think are important in a photo brighter or more. The final images improved by this application will be excellent.
Of course, all processing is done on the server; But do not worry because all the files will remain only on your smartphone. The developers guarantee that your files will not store on their servers and that everything will process in strict confidence.
Adobe Lightroom
Adobe Lightroom is another powerful developer app that offers users many options for enhancing and editing photos. You can use it to create great and beautiful photography projects, improve your editing skills and even use ready-made templates to enhance your images. This application has been developed to improve the quality of images.
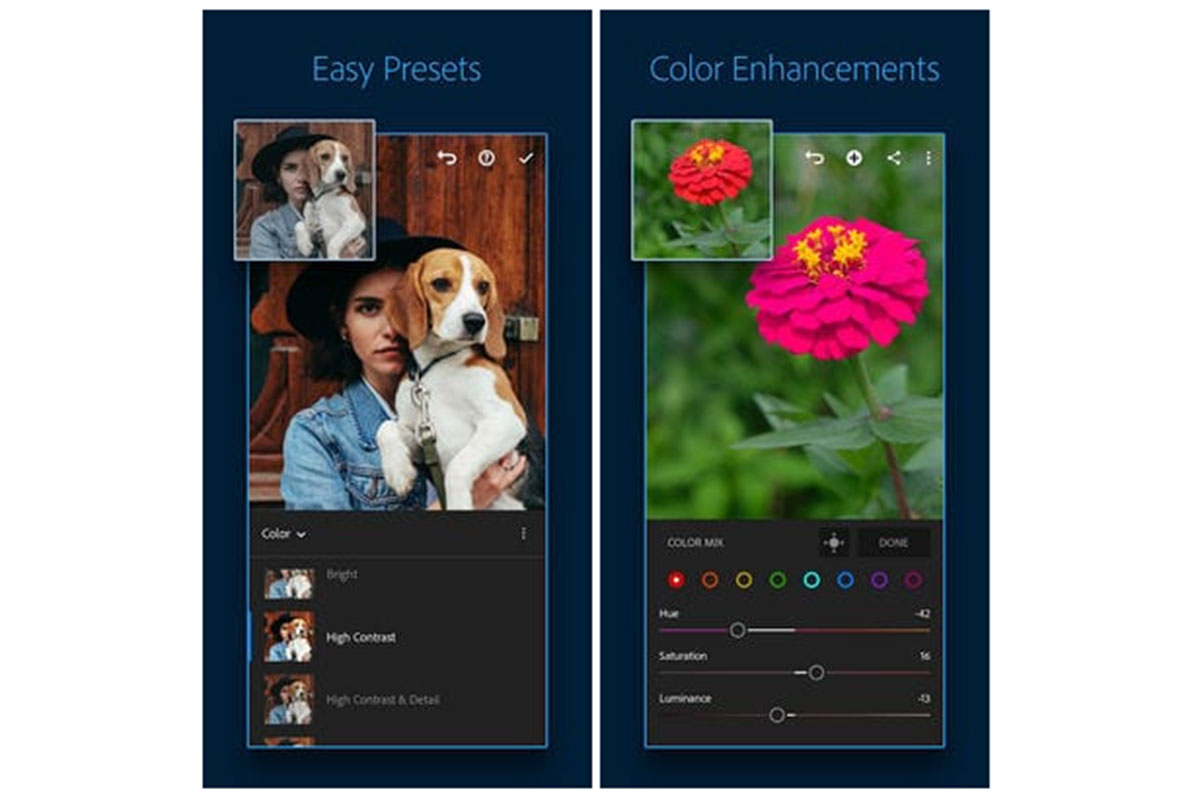
Adobe Lightroom lets you not only enhance your image but also learn how to edit it yourself. This app includes several interactive tutorials that teach you how to work with different tools, basic skills, and processing details.
For quick editing, you can use the default Adobe Lightroom settings, which automatically apply all the necessary settings and enhance your photos. Of course, advanced color correction allows you to make beautiful and professional changes to images that are not available with ready-made presets.
EnhanceFox
EnhanceFox is a great tool for improving instant photo quality. Using it, you will immediately see the result you expect. Its capabilities include reducing blur, increasing sharpness, size, and quality of photos. The EnhanceFox app will be your real helper; Because not only can you edit your new images, Even old photos taken with other devices can manipulate.

Like many other services, EnhanceFox does all the editing with AI. You will probably enjoy working with this application; Because you are provided with many features and effects that you can use to edit your files like a professional, and you will not need anyone’s help.
This app does half the work automatically, and you just need to make changes to the final settings and color scheme. With EnhanceFox, even older yellowed images can convert to higher quality versions that are sharper and more printable.
Denoise it
Have you ever noticed the noise that is constantly generated in the images recorded by your phone camera? This can cause the blurry image to be noisy or unusable altogether. If you have experienced these conditions, the Denoise app will work for you.
This app is great for getting rid of noise or blur in photos. Using neural networks, artificial intelligence, and other advanced tools, Denoise turns a simple, low-quality image into a beautiful image. You do not need to make precise adjustments to get the best results, and literally, everything is done instantly.
In Denoise, all photo editing is done on the server, and the image is sent to the server, where it is improved using powerful hardware.
When the Denoise editing operation is completed, the cache and the file are destroyed. So you remain anonymous, and your images are not stored anywhere. We recommend that you try Denoise, and we are sure you will be shocked by the results.

Sometimes images can be a bit blurry or not sharp enough, But you do not need to worry. Using one of the introduced apps, you can easily improve the quality of the photo, edit it immediately and take other necessary steps.
Currently, there are many applications in the Play Store and Google Play that can do this for you, and we tried to provide you with 9 of the best ones that are easy to work with and have great performance. We hope you enjoy using them and increase the quality of your images.
Improve photo quality with Photoshop
Now that some cool phone apps have been introduced to enhance image quality, it’s time to go to Photoshop and see how you can get better quality photos using this software.
The work to be taught in this section is not a miracle, But they can improve the image quality when magnifying from low-resolution samples. The following methods are straightforward; So if you want to improve the quality of your images with Photoshop, run this software right now and follow the path below.
A better way to enlarge images
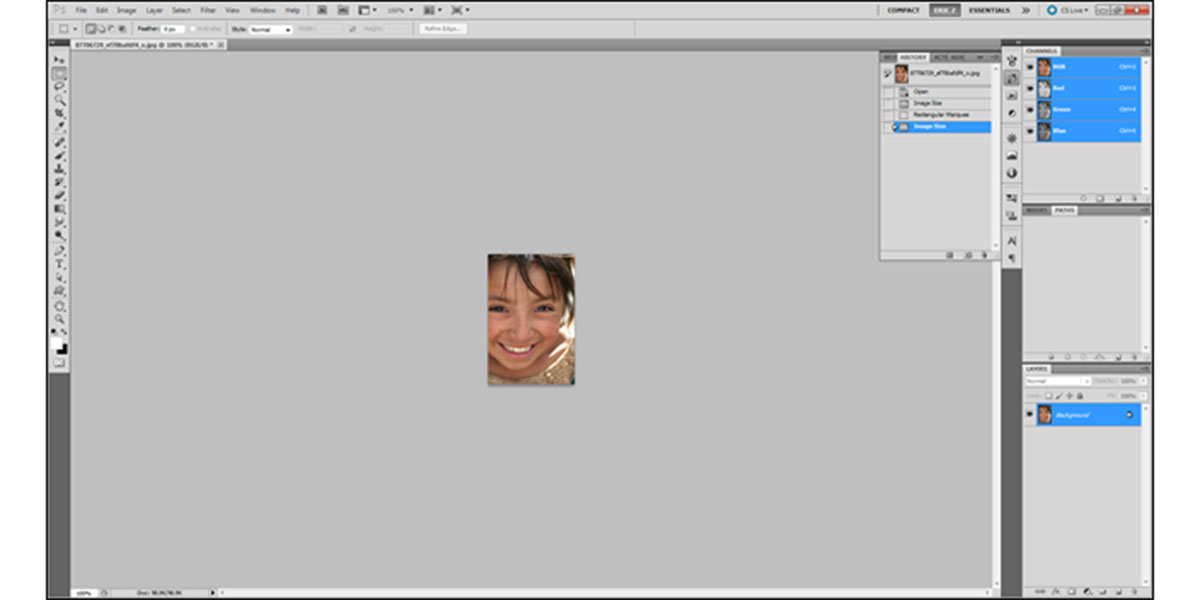
This is our image at the starting point. The photo is at 100% magnification, and you can see how small and low quality it is.
As you can see, the resolution is shallow. Let’s improve the situation a bit with a basic magnification.
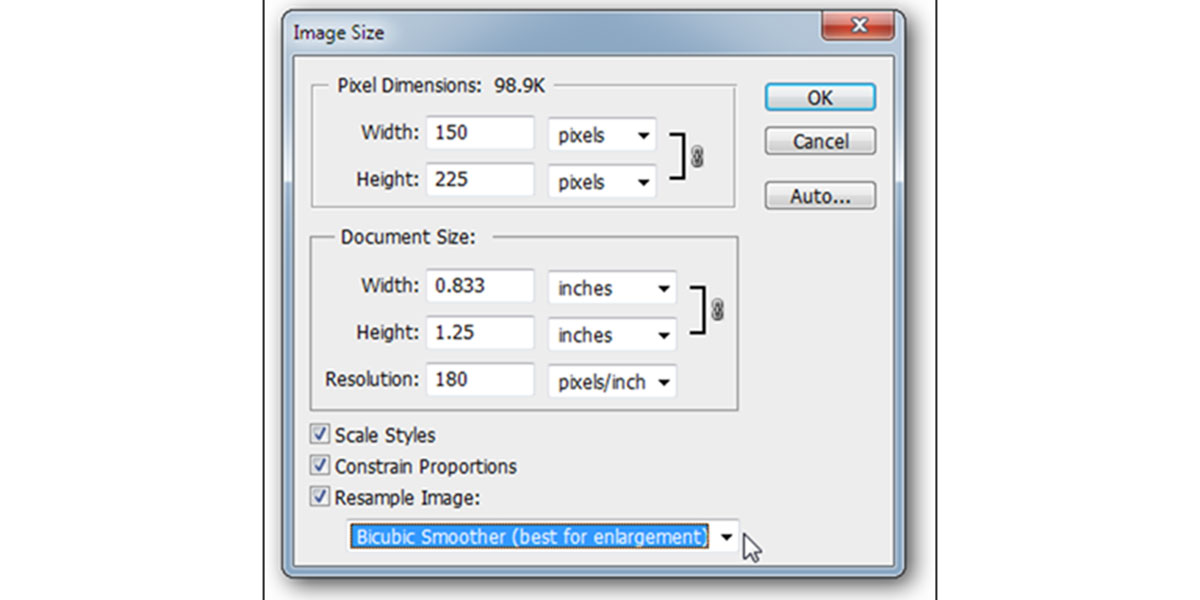
Go to Image> Size Image. Select Bicubic Smoother from the section where the phrase Resample Image is written. This is the best mode for zooming. Photoshop uses Bicubic mode by default.
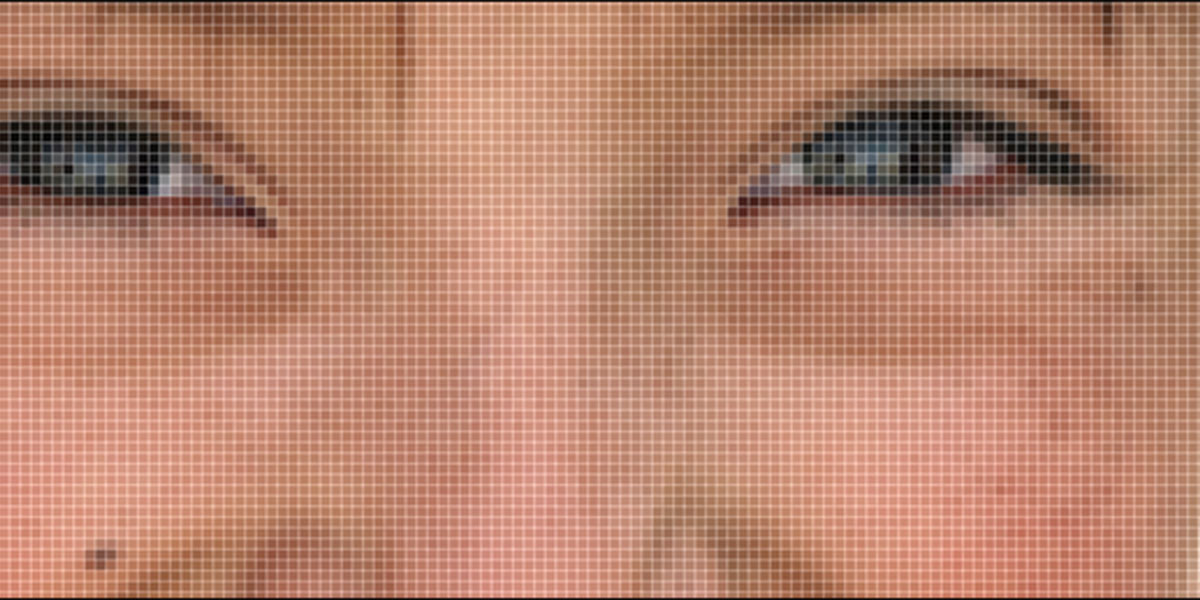
You can see the difference between the Bicubic Smoother version on the left and the Bicubic on the right in the images below when zooming. Changing the anti-aliasing model can make a big difference in the edges of the image and make them smoother. This can have a significant impact on the result.
Improved detail in enlarged images
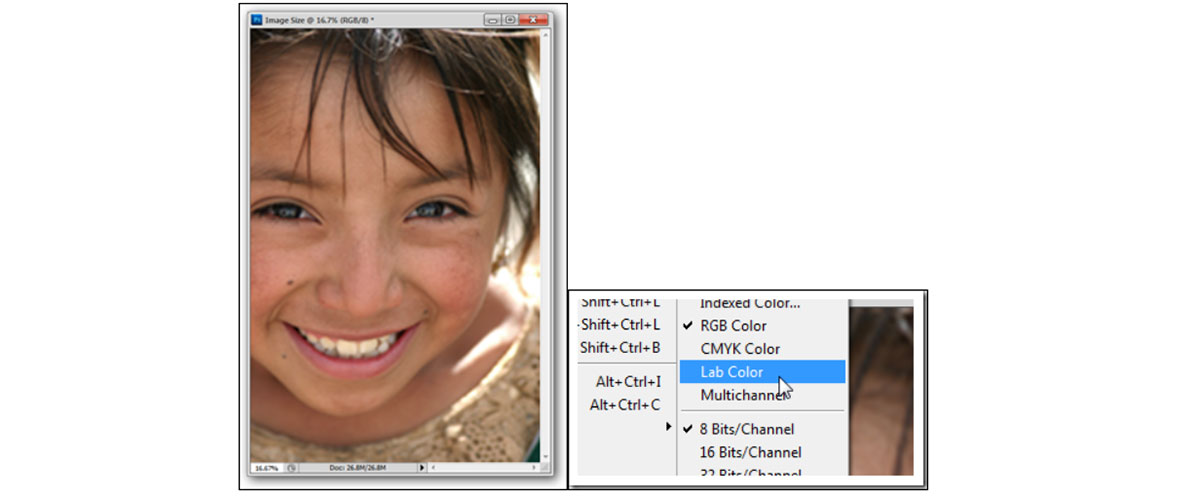
Most Photoshop users do not go beyond RGB or CMYK. Today we will use another color mode called Lab Color. Select any enlarged image you like (we’re going to use the previous image) and change its color to Lab by going to Image> Mode> Lab Color.
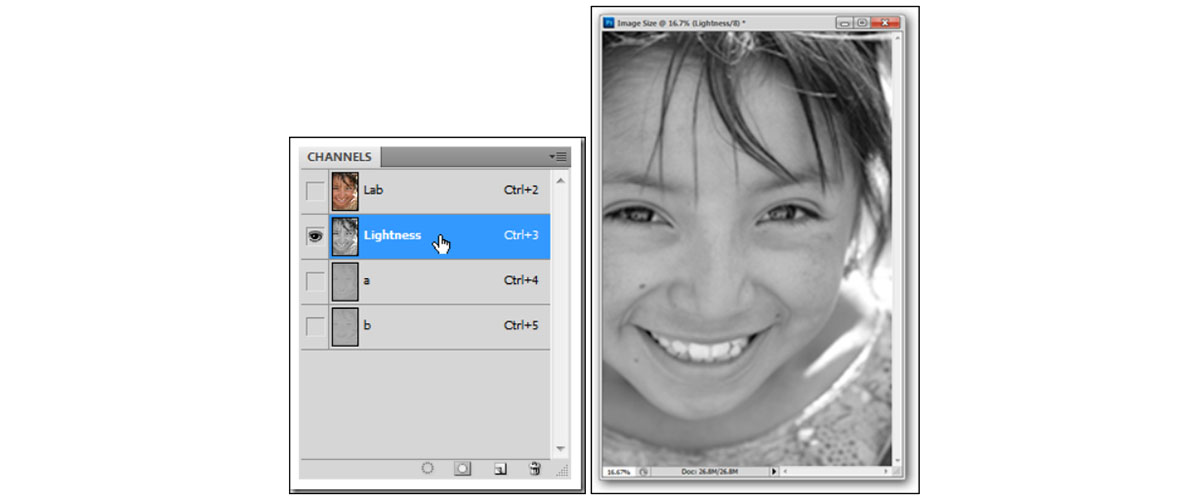
Go to Window> Channels to make sure you have a channel panel open. Then select the Lightness channel or, as shown, click on the hidden layer next to channels a and b.
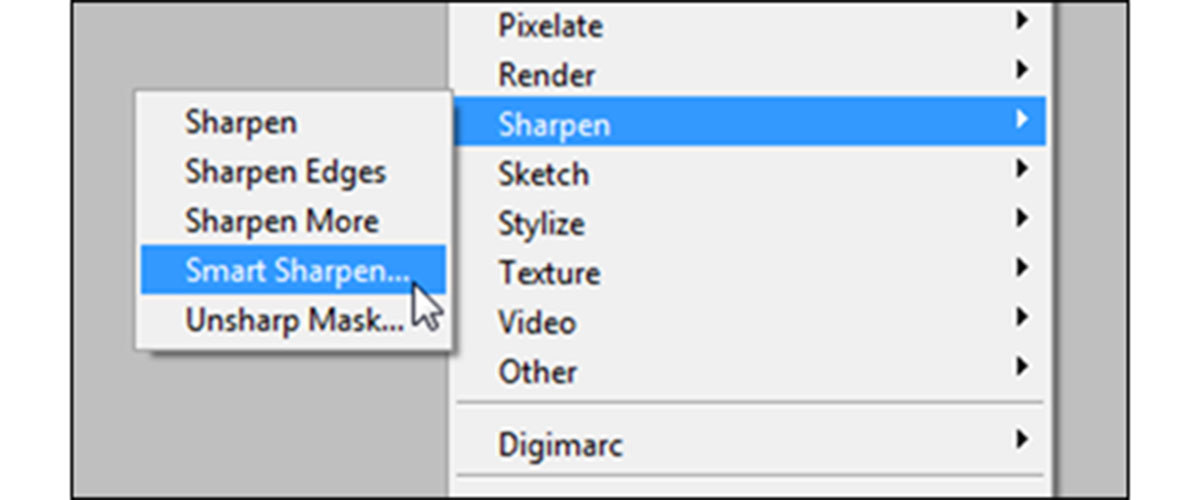
Select Lightness, go to Filter> Smart Sharpen, select Smart Sharpen filter.
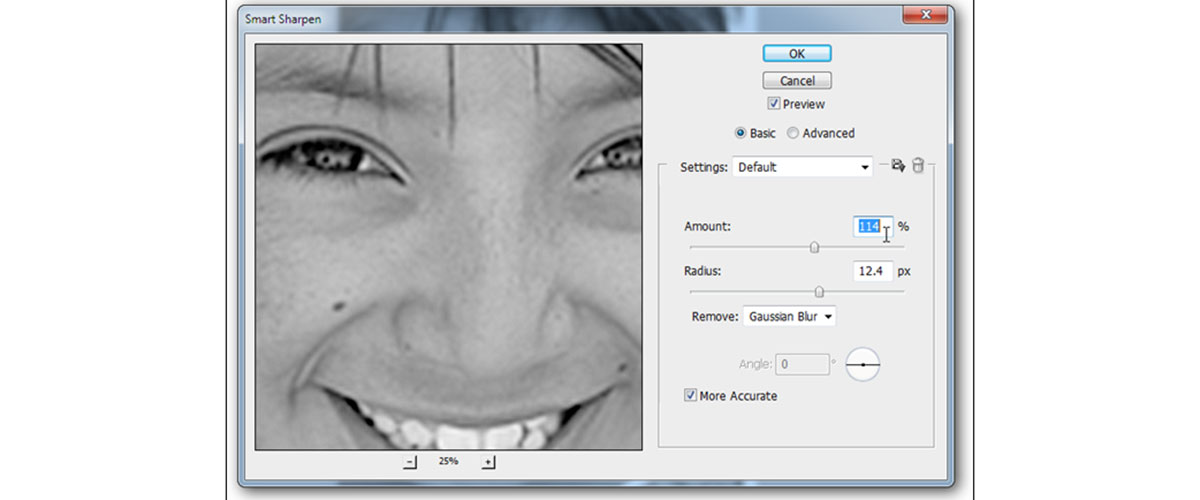
The above settings were perfectly appropriate for our example; But if you need to make a little change and find your own options. It may be best to apply the Gaussian Blur Remove settings as shown above. 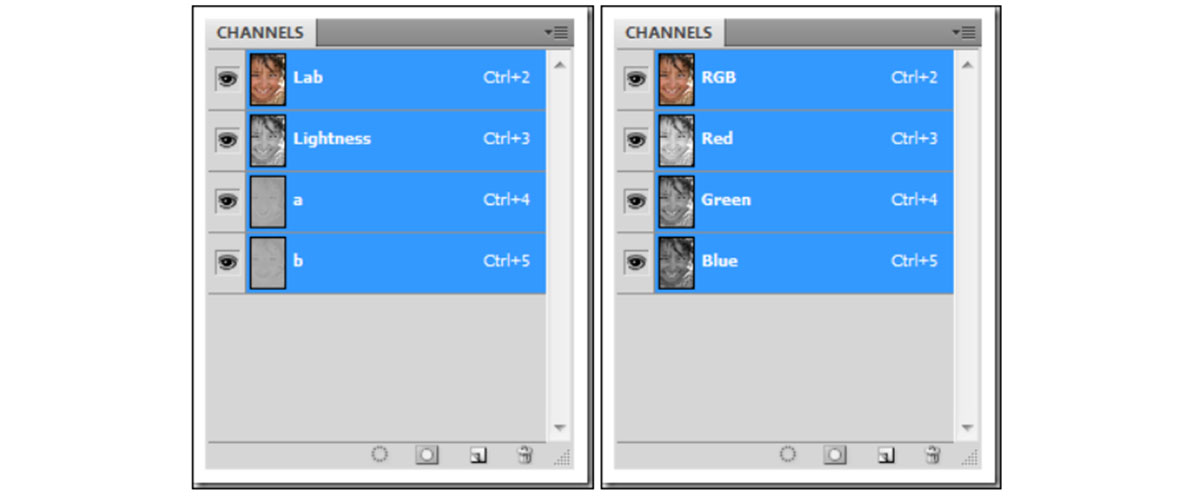
You can stay in Lab Color mode or convert it to RGB again. Unlike the conversion between RGB and CMYK, this will not show any noticeable color change, and the RGB will convert completely. In each color mode, press Ctrl + 2 to select your combined channel set.
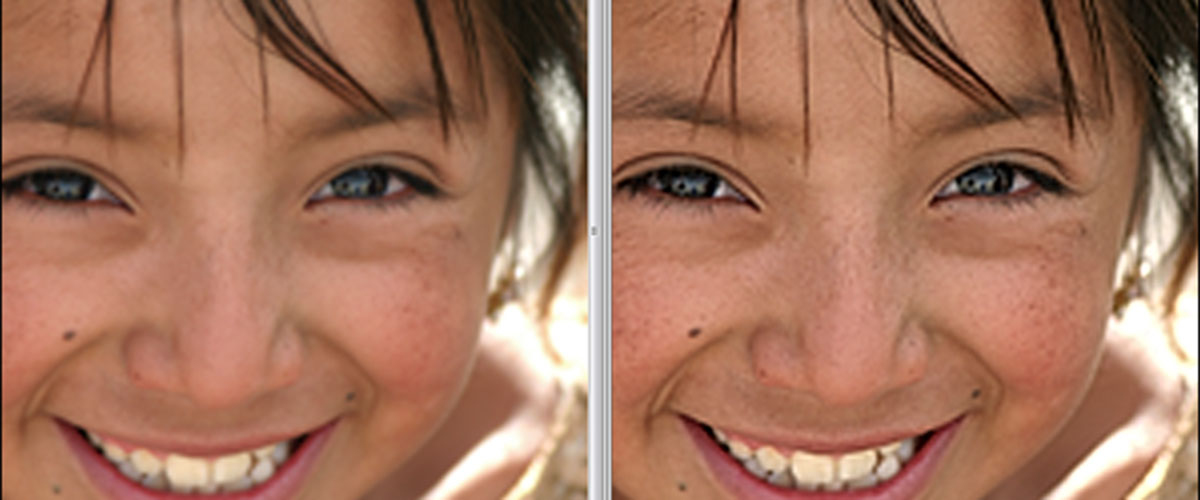
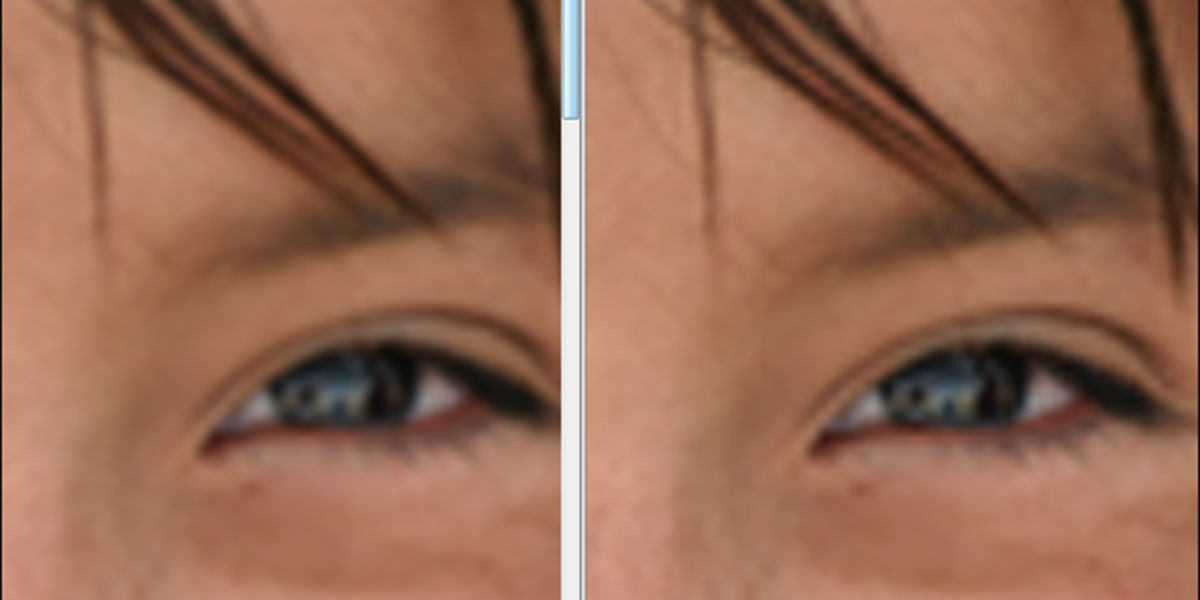
The final image is not extraordinary, But the comparison before and after shows a very significant difference. Our enhanced image (on the right) has a much richer skin texture and does not appear to be approximately 2,000% larger than the 150-pixel wide image.
Improve image quality in Photoshop with High Pass filter
If you are looking for a way that does not damage the image after magnification and does not significantly increase its quality, the Photoshop High Pass filter is for this. By increasing the resolution, the quality of the images can be increased; Because this will make the details of the photo more visible than before. There are many ways to do this, But the High Pass Photoshop CC filter is a favorite of many users because it is not malicious.
The beauty of this method is that you can apply the filter as a layer mask; So you are not actually manipulating the base layer pixels. This also means that you can paint the layer mask on the image to identify specific areas that need clarity and prevent unwanted stains. You can also change the value of this filter using the options in front of you.
Create a High-pass filter
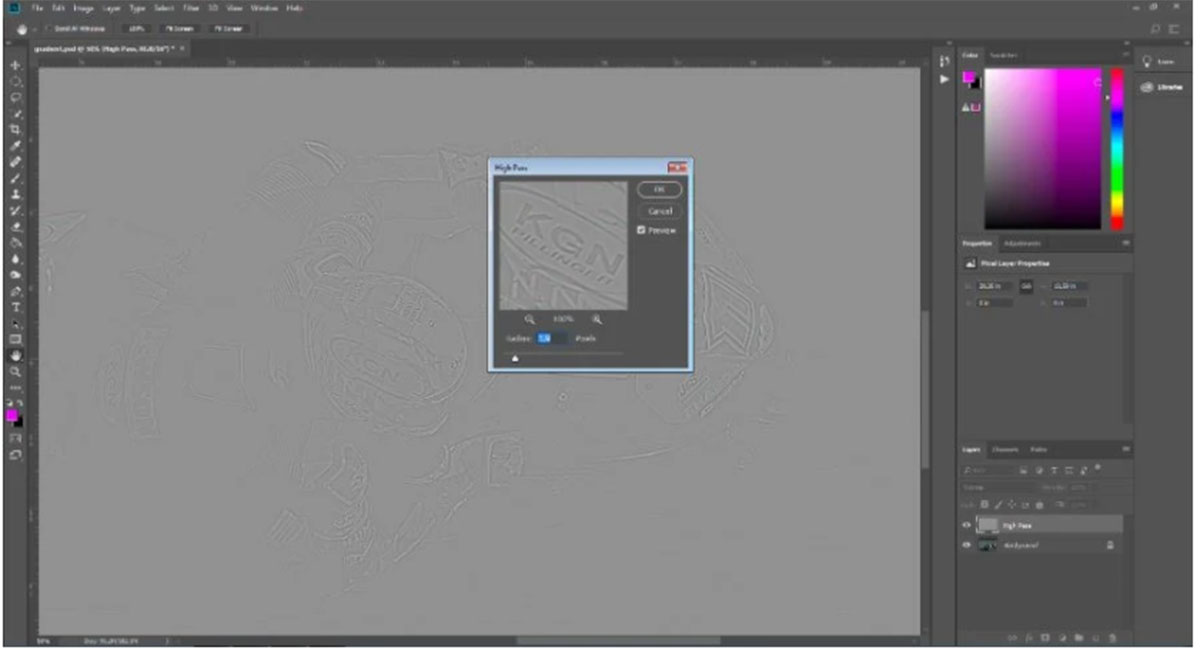
Open your image in Photoshop CC and press Ctrl + J to copy the background layer; We change its title to High Pass. Go to the menu bar and select Filter> Other> High Pass. Your image is now covered with a gray overlay, and the High Pass window appears. Use the slider to select the radius. The higher the number of pixels, the sharper the image. A useful general rule of thumb is to adjust the radius so that you can see the outline of the image. This number is rarely placed above 2 pixels.
Set the layer mode
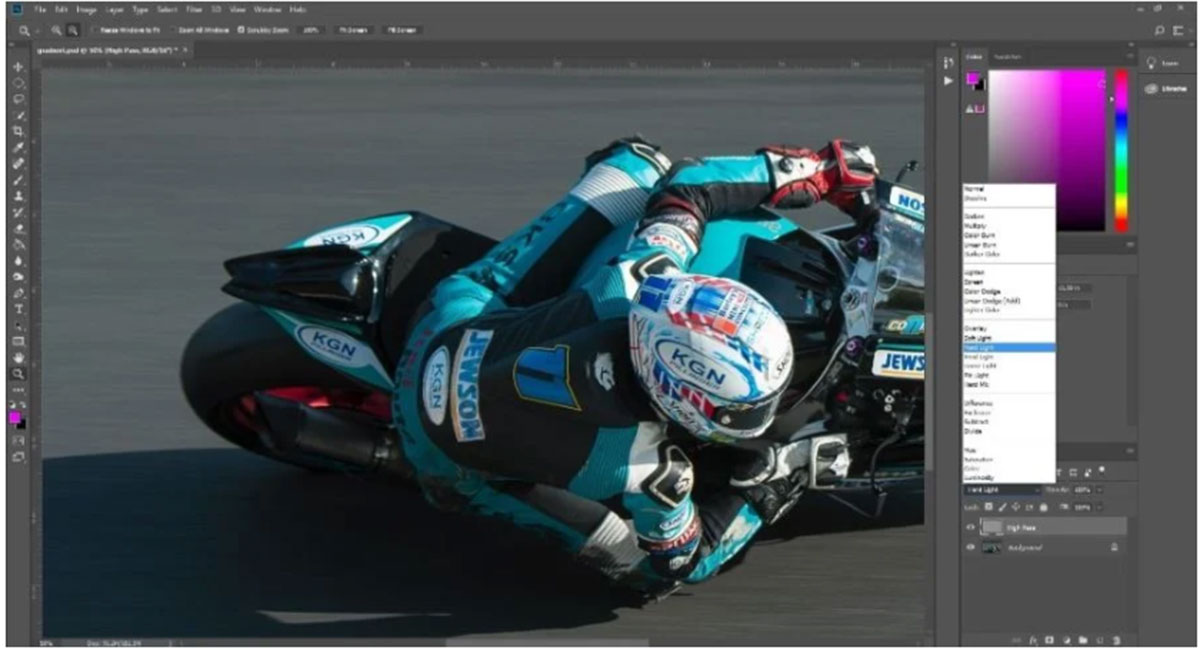
To remove gray coverage and increase the contrast of the image outline by the filter High Pass, you should use a combination of three modes: soft light ( Soft Light), overlay (Overlay), or light-hard (Hard Light). Switching to soft light achieves the most subtle results and hard light the most intense. The overlap model, meanwhile, offers something mediocre. The whole image looks clearer when you select the blend mode; But to avoid any visual distortion and keep the image as clean as possible, it is better to sharpen only certain areas of the image. To do this, you need to create a layer mask.
Create a layered mask
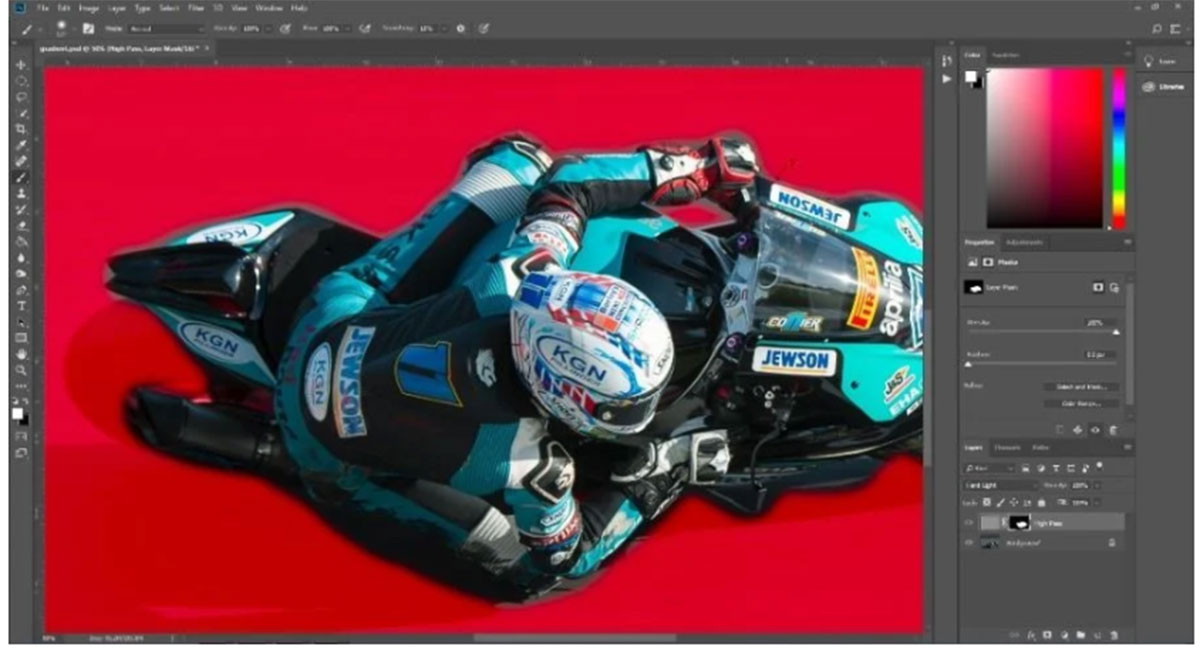
While in the High Pass layer, select the New Layer Mask option found under the Layers section. Go to the menu bar and click Edit> Fill. Ensure the Fill menu is set to Contents: Black, Mode: Normal, and Opacity: 100%. Then select the OK button. Now tap “\” on the keyboard to display the layer mask and make sure the background and background colors are set to the default black and white. Set the background color to white and use a soft pen to draw the areas you want to highlight. You can reduce the Opacity value of the layer for a more subtle effect.
Now the quality of your image has been increased by using the High Pass effect.
Increase the quality of typography
In this section, we are going to teach you how to increase the quality of typography.
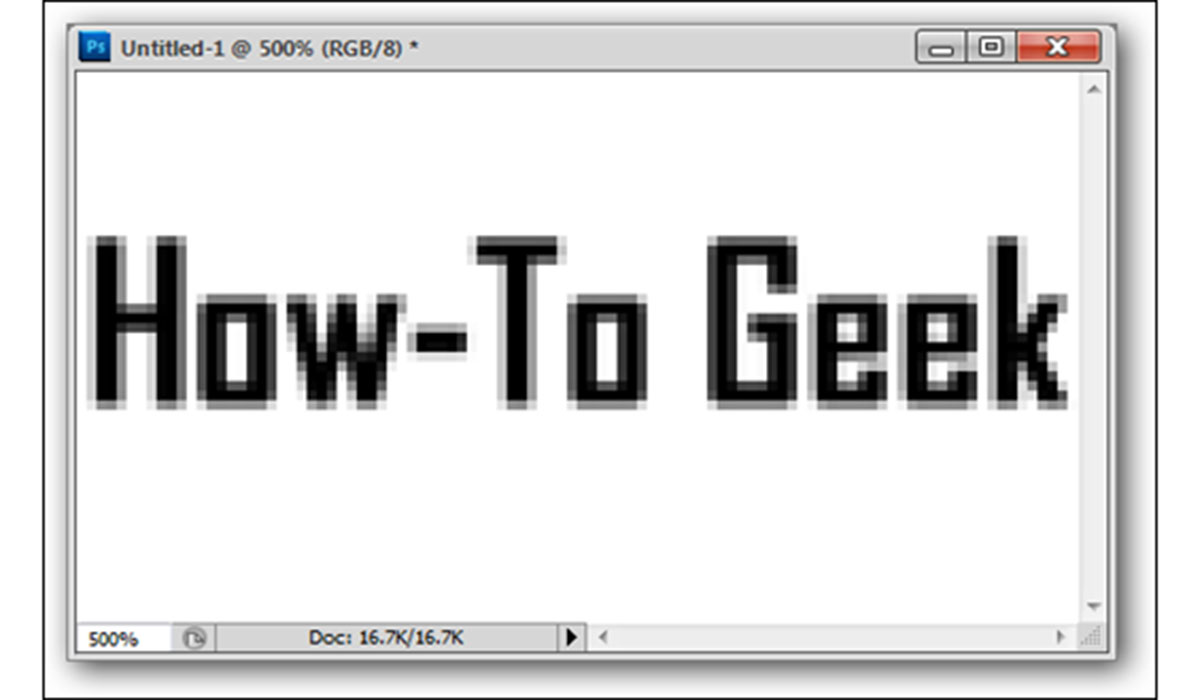
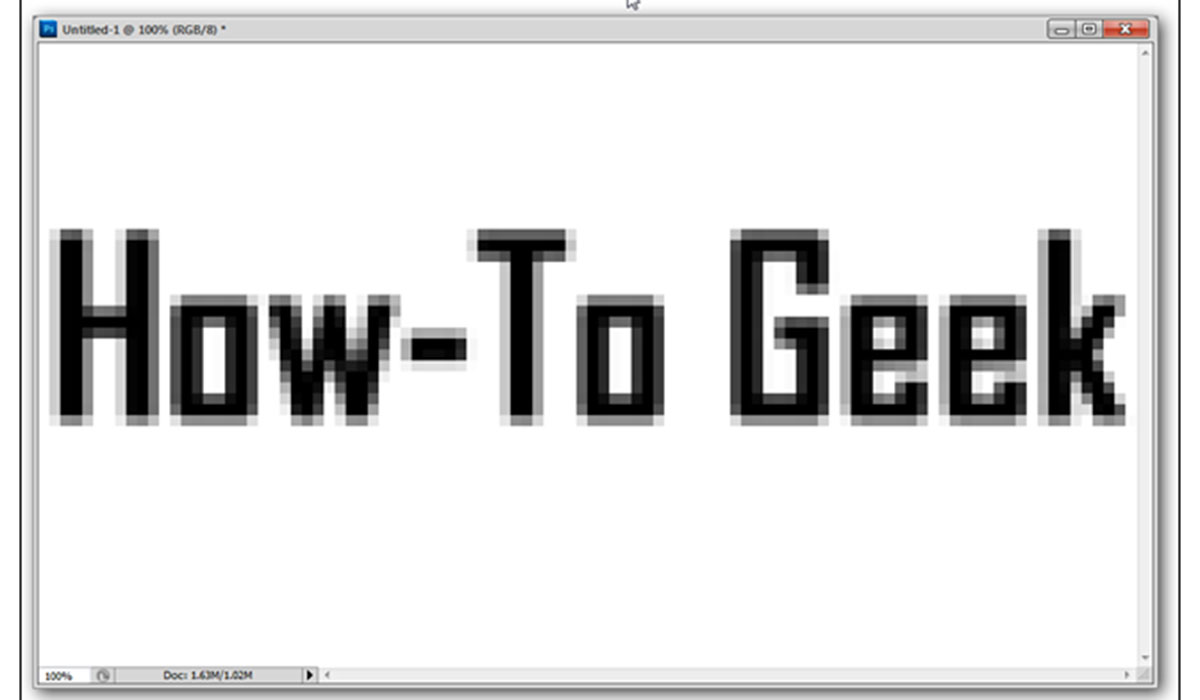
In general, poor-quality typographies are one of the most difficult to correct. For example, this article uses an example that is only 100 pixels wide and has large and noticeable problems.
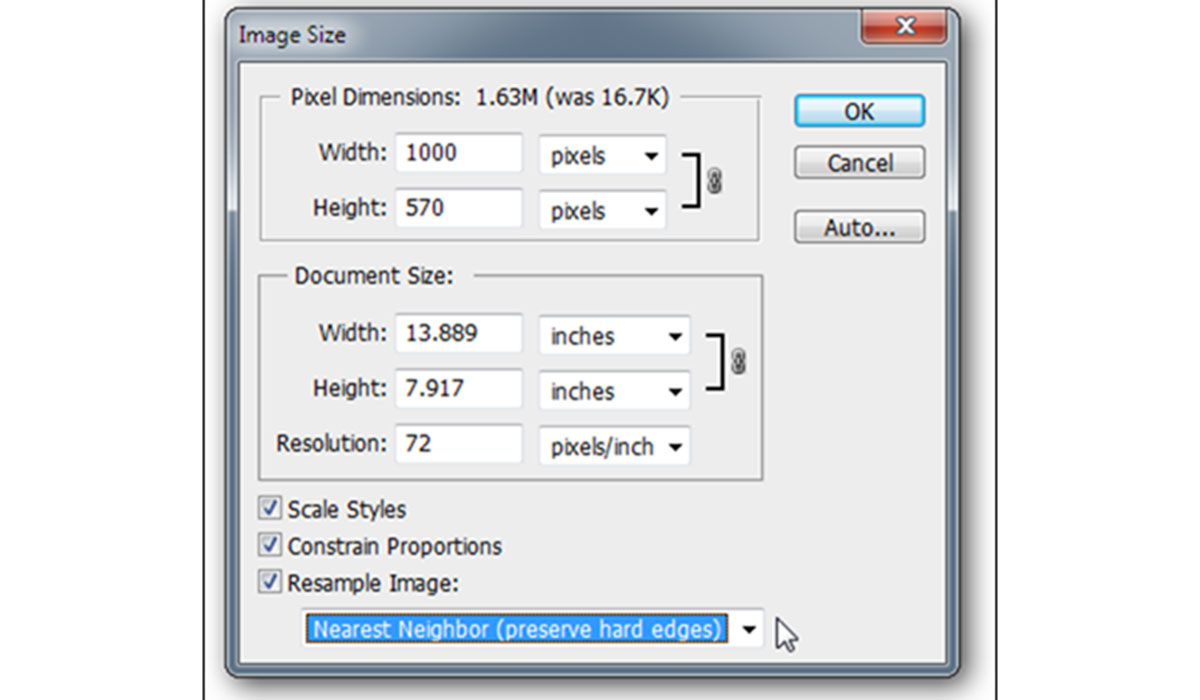
Resize the image to the size you want. Here, we increase the size 10 times and use the Nearest Neighbor settings to smooth the edges. Do not worry; everything will get better later.
Our typography at this stage does not seem to be any different from before! Let’s see what he has done to change it.
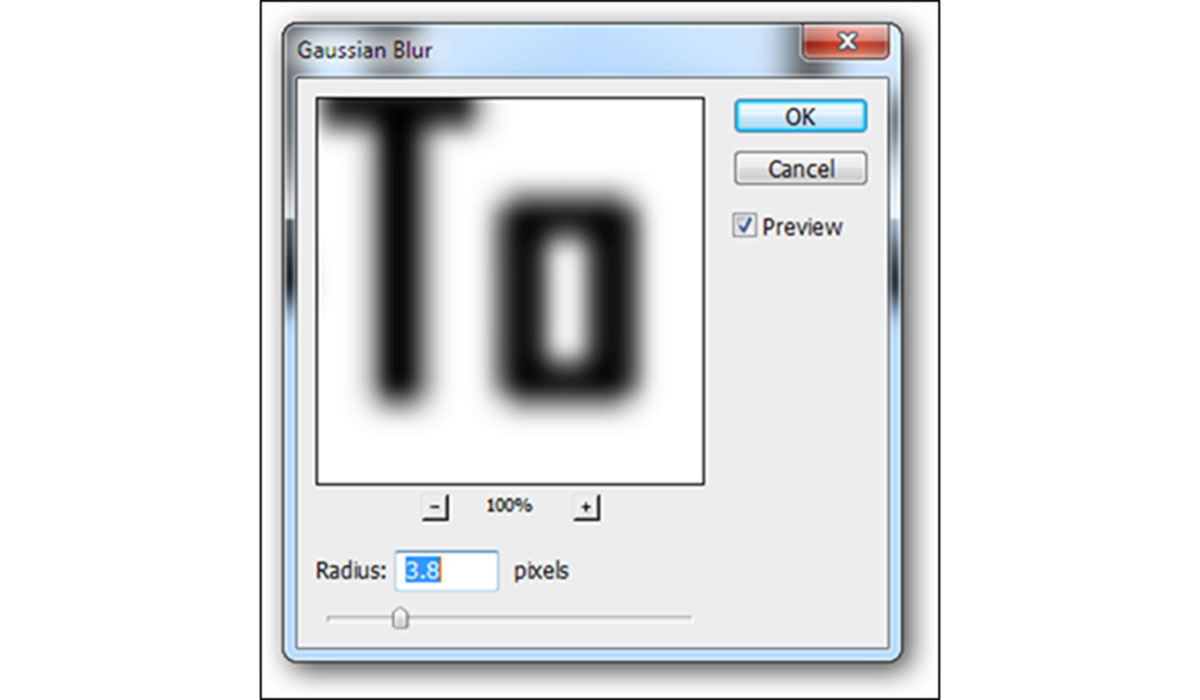
Apply Gaussian Blur by going to Filter> Gaussian Blur and using settings that blur the edges without making the text completely illegible.
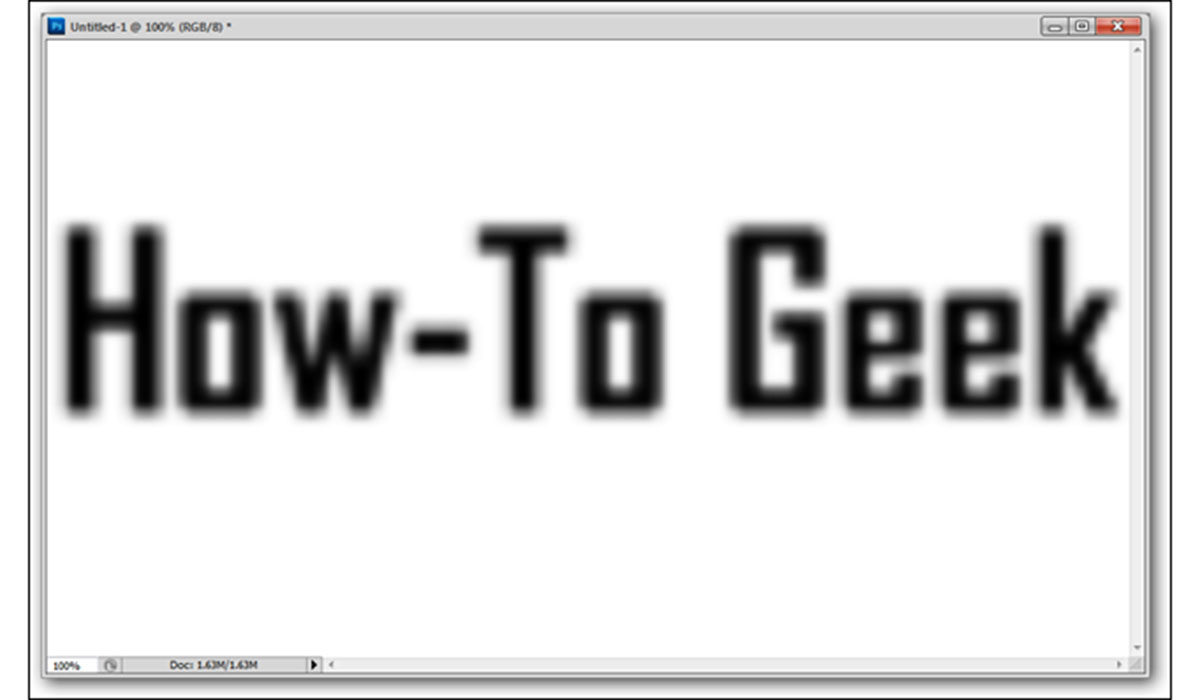
The final model should look something like this.
Now we want to use a Threshold settings layer. Click the black and white semicircle icon in the Layers panel.
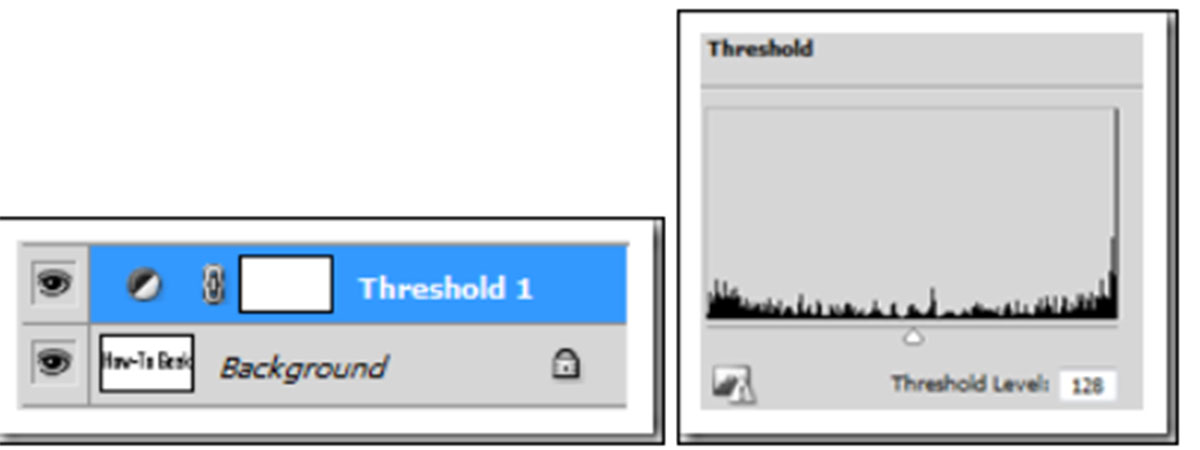
Certainly not a great example; But it is better than the typography we saw at the beginning. If you want to increase the quality, you have to start repairing the photo with a special pen and patience. The method we have taught can be very effective for people who deal with typography often and often have access to low-quality versions.
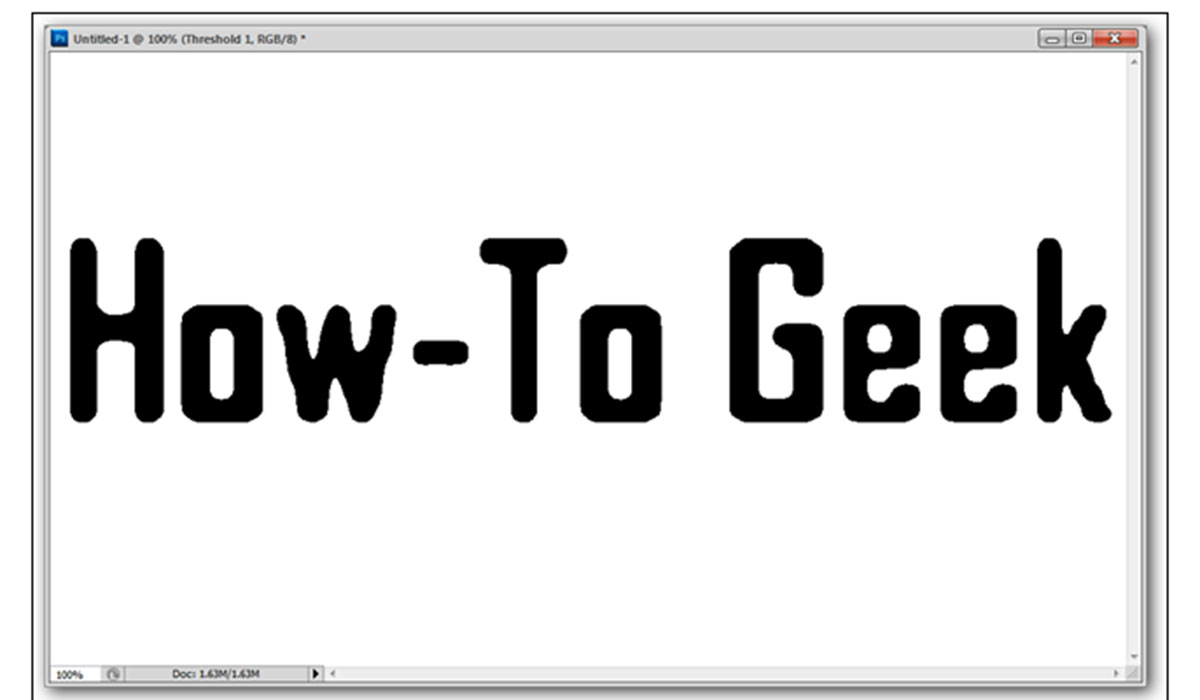
Photo enhancement applications
Now it’s time to include some cool and powerful software that can help you along the way.
In the following, four software to increase the quality of images is introduced.
Photo Acute Studio
If you have an old image that you want to print in higher quality, Photo Acute Studio is ready to help you. Even if you have taken several photos with your smartphone, they are not what you wanted for various reasons, and this software is still useful. It doesn’t matter if you are a professional or amateur photographer; everyone can use Photo Acute Studio to enhance their image quality.
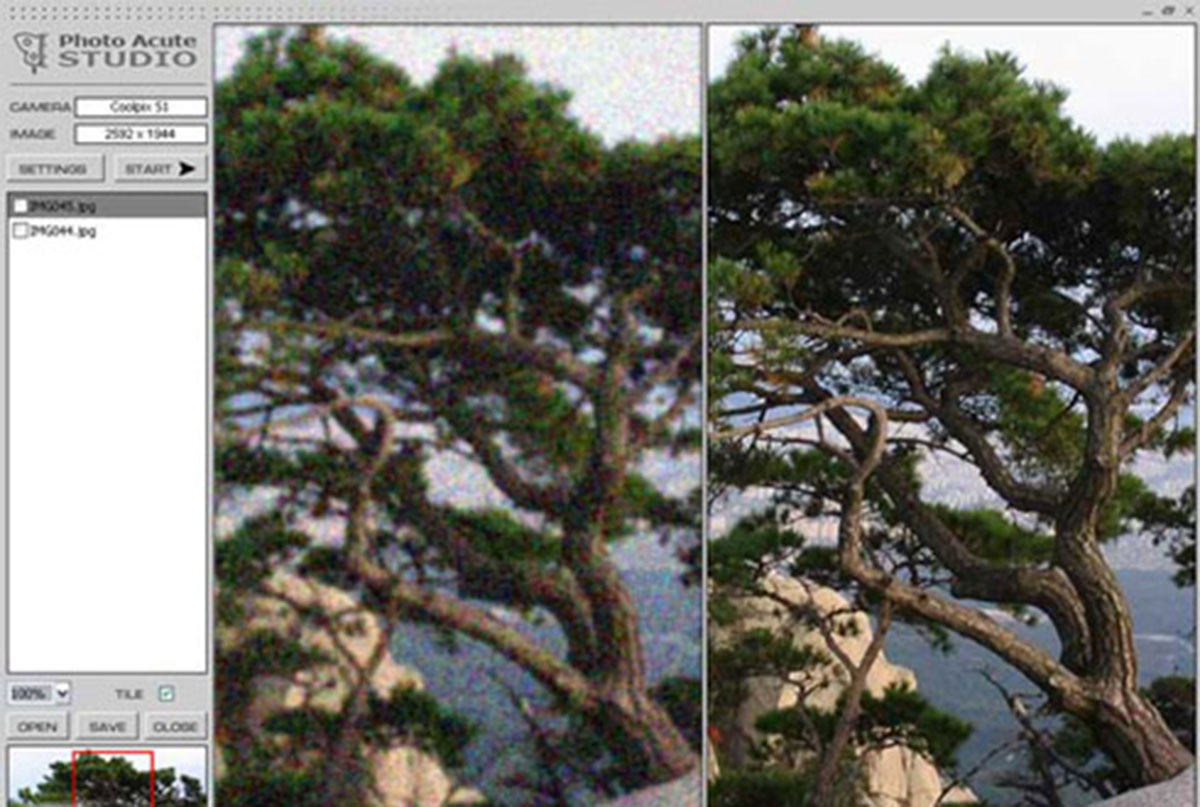
One of the best features of this software is noise cancellation, image enhancement, delete of desired parts, simultaneous enhancement of a collection of photos, and the like.
Light Image Resizer
All photo editing software offers the ability to resize; Unfortunately, not all of them allow users to resize the image without a quality effect. This feature may embed in them; But because of its complexity, not everyone can use it.
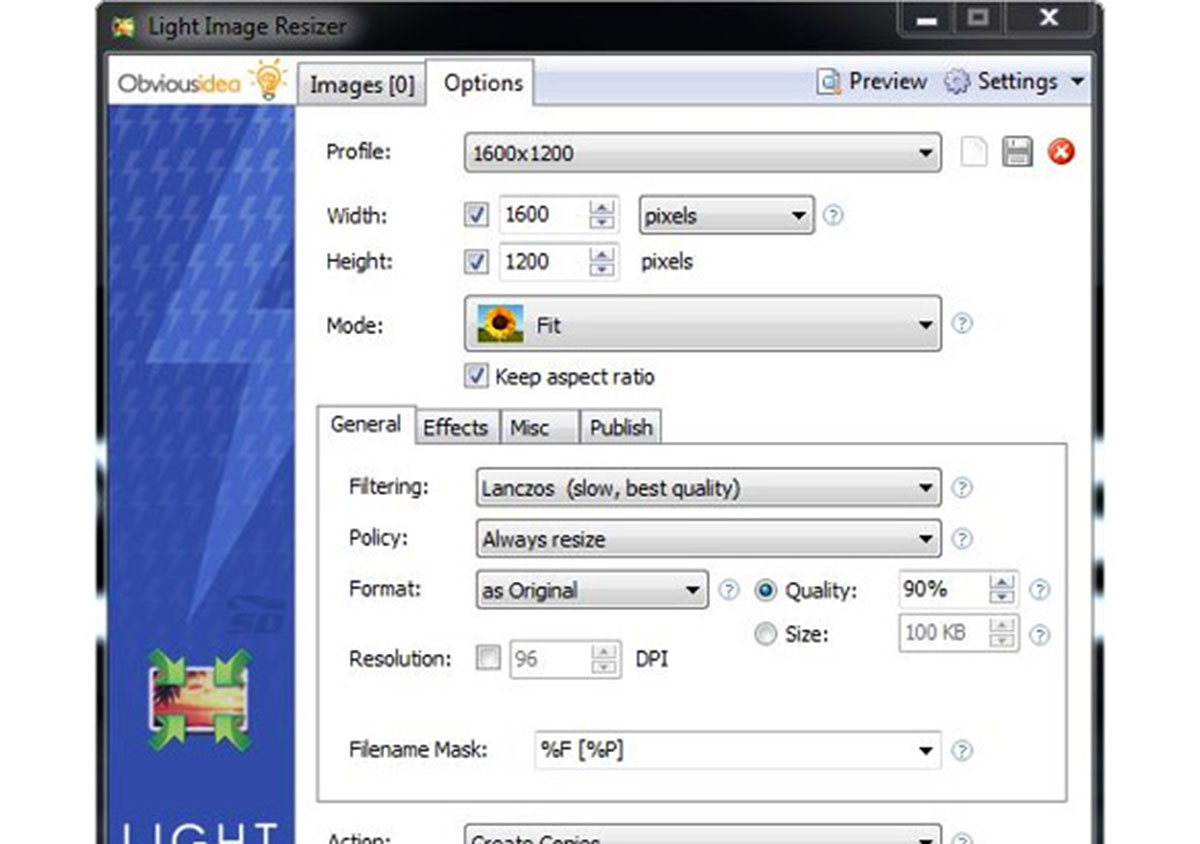
Light Image Resizer is a compact software that comes in handy to help people and is easier to work with than other options. Using this software, you can increase the size of the photo without losing quality. Light Image Resizer supports various formats, including JPG, BMP, PNG, GIF, TIFF, JPEG. You can use this program to put watermark images as a group.
AKVIS Magnifier
Various applications have been developed for image magnification, But not all of them offer the AKVIS Magnifier features. This software professionally enlarges the size of your photos without losing quality. The developers of AKVIS Magnifier have used an advanced algorithm that helps the software magnify images without creating noise or blur.

Attractive features of this program include increasing the resolution, eliminating the problem of edging photos, the possibility of making group changes. One of the great features of AKVIS Magnifier is that it can be used as a Photoshop plugin.
Simply Good Pictures
One of the best possible options that can fully enhance the quality of images is Simply Good Pictures. If you are one of those people who do not have enough time to apply the settings, this software is the best choice; Because all steps are performed without user intervention.
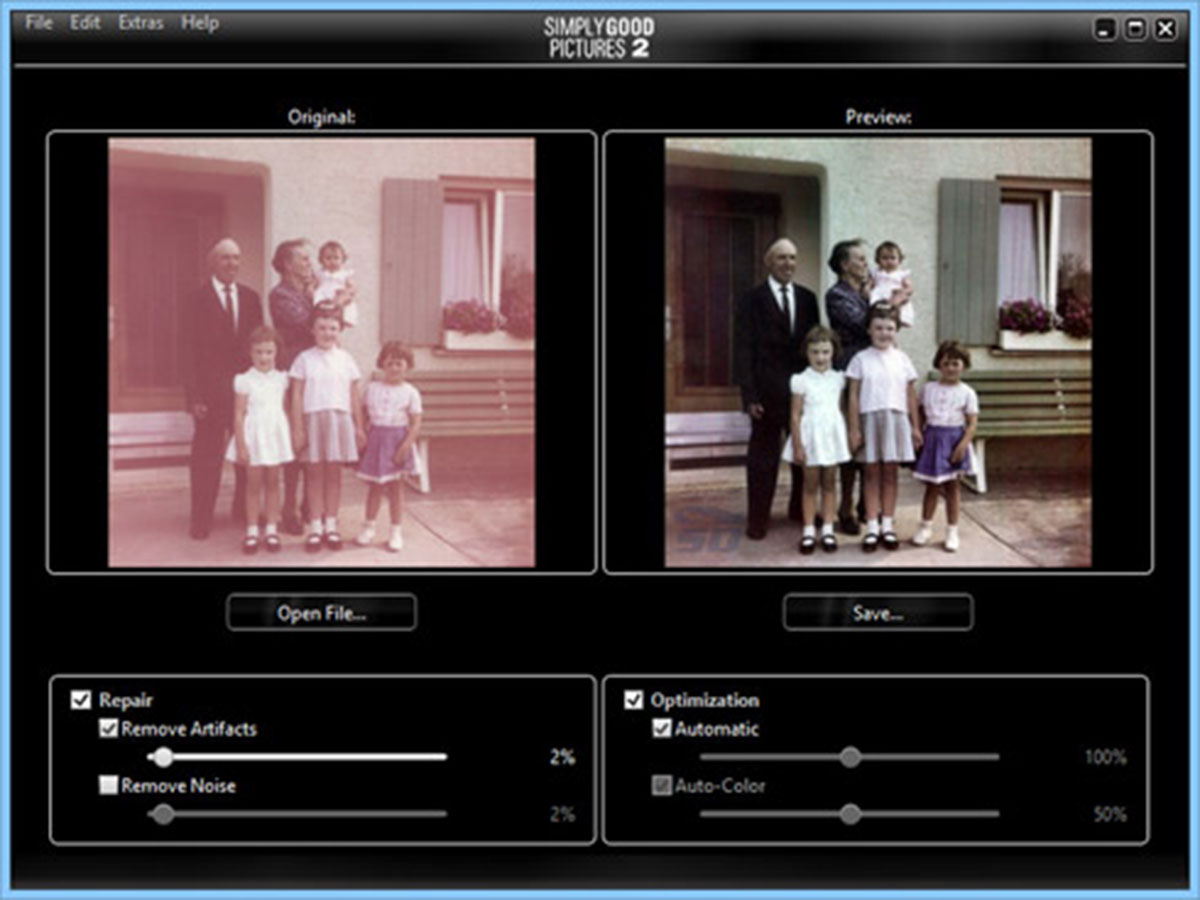
Simply Good Pictures uses the latest algorithms available to enhance image quality and optimize the final image. It does not matter if you select the old scanned image of your album or the photo you recently took with your smartphone, just to provide quality to the software to provide it. Of course, all steps are indeed done with just one click; But certain settings can be changed if needed.
Improve the quality of online photos
Digital cameras do not always capture the image as the scene looks to the eye, so it is best to edit those images. So far in this article, we have introduced you to different types of applications to increase image quality, and now it is time to go to websites that can do this for you online.
Whether you are an amateur or a professional photographer, you need to edit your images. Simple effects such as light change and contrast can help a lot. But Photoshop is not for everyone, so let one of these smart and automated web software do the heavy editing.
In the following, we will introduce you to five useful and practical websites that can easily do the work of editing images and increasing their quality.
Let’s Enhance
Let’s Enhance is nothing but magic. If you have a low-resolution image and want to enhance it, Let’s Enhance can do this without creating pixels or noise. This magic happens with Let’s Enhance machine learning AI. The website analyzes your photo and finds out what the image is, and then increases its resolution without damaging the image. The secret of Let’s Enhance AI performance is that it adds the right pixels to the magnified image detail to get the desired result. Finally, you will have access to a real photo with a higher resolution than your previous small version.
The Let’s Enhance website gives you a token when uploading a photo; Because there is a limit to the number of servers. Be prepared to wait about an hour or two to achieve the final image.
Fotor
Fotor is best known as one of the desktop software for using filters like Instagram, But there are many more possibilities. As an online photo editing software, a One-Tap Enhance button has been added to enhance your images.

You can upload an image from your hard drive or via Dropbox, Facebook, or any other link on the web. Once the necessary changes have been made with the push of a button, use the Compare option to see before and after your image. By doing this, you can see the changes made and notice the difference.
Fotor has many tools to make the image more attractive. There are several options in the Basic and Fine-Tune sections that allow you to change settings, such as brightness and exposure. After making the necessary corrections in this section, you can try other options as well.
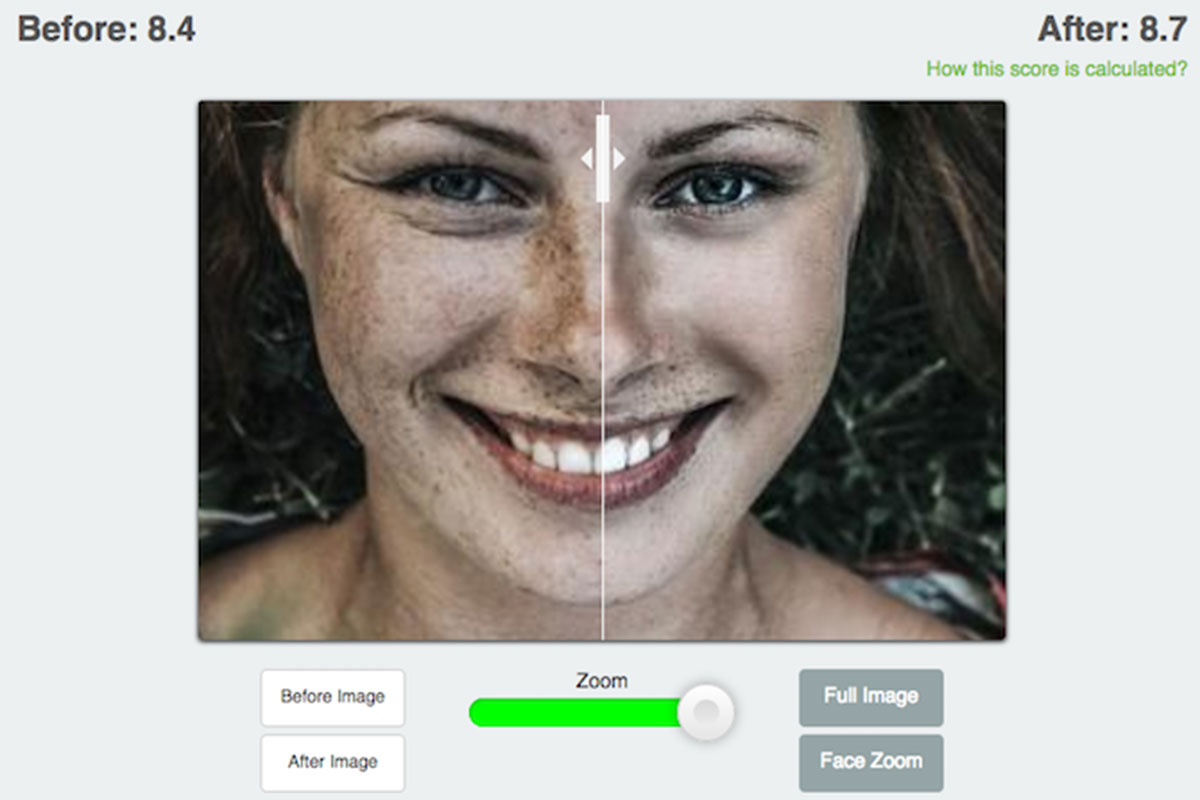
Improve Photo
All one-click photo enhancement websites usually have the same settings, and the difference is the level of process execution. Unlike others, Improve Photo lets you choose between two advanced image levels.
We will now explain the process of doing this with an example. Imagine a photo whose brightness is increased by 75% with one click. Now imagine the same image that has increased its brightness by 45%. If you could see the result of both, you would surely choose a better example and have a choice between two different versions. This is the feature that Improve Photo offers that sets it apart from the competition.

This feature is handy for human face images. For example, face cream is not something you want to remove, but these correction websites eliminate this part. But in the meantime, Improve Photo lets you choose the photo you think is best.
Enhance Photo
Like other photo editors introduced so far, Enhance Photo does its job well; But it offers something that others do not: customization.
The software of this website attacks the most common problems of bad photos and does the following:
- Light correction
- Blurring
- Color temperature
- Adjust the color saturation value
- Noise reduction
- Eliminate red eyes
As a user, you can select any of the effects you need for your final image before using the website image enhancement feature, by default, Pho. Analyzes the image and suggests the best filters to use; But after that, you have the right to choose and personalize the final file. For example, you can tell Enhance Pho. that the redness of the subject’s eyes has nothing to do with it.
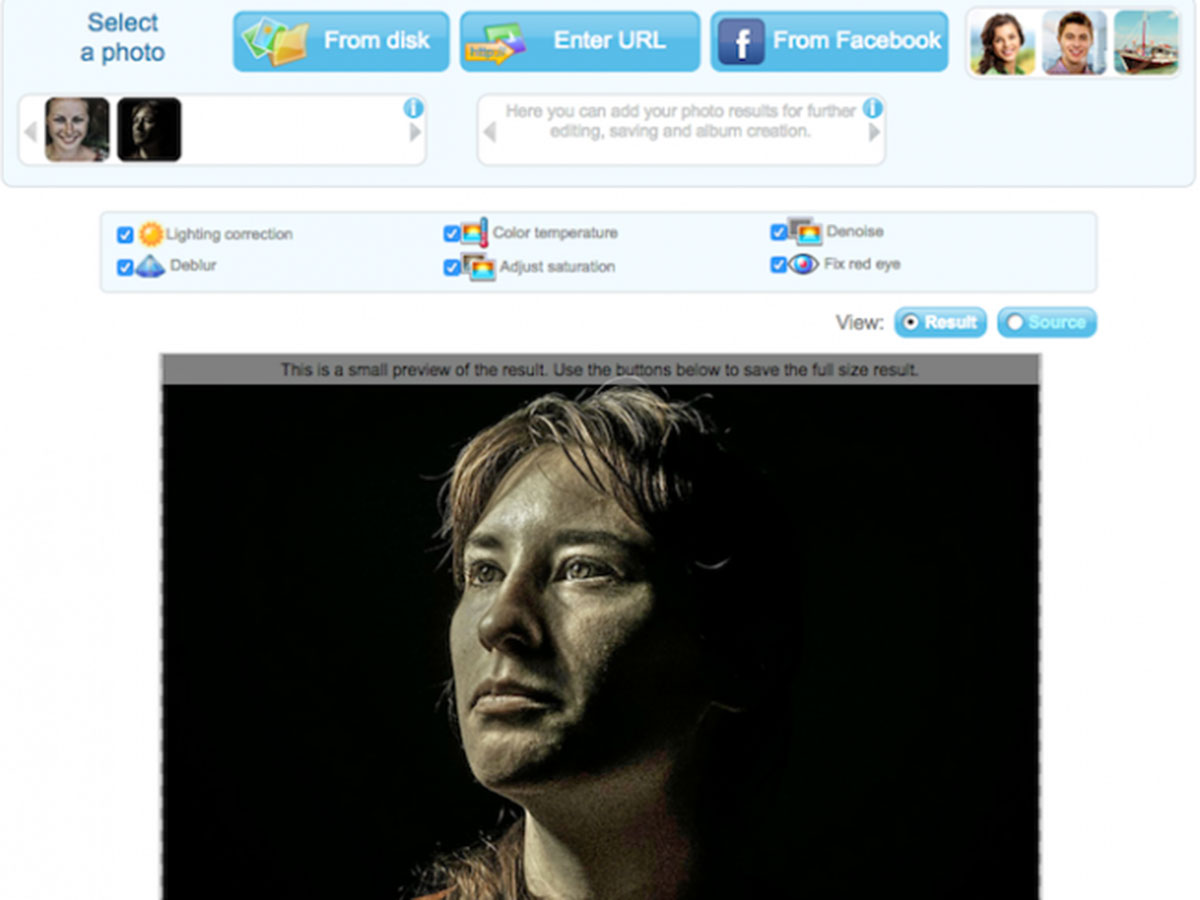
On this website, you can also compare the improved image with the final version and download it. All of these features are provided by a free online photo editing website.
PinkMirror
Unlike other software in this series, PinkMirror only focuses on the face. So if the image you want is a selfie you want to enhance, the PinkMirror website lets you do just that.
After uploading the photo, you must first specify all parts of the face using the mask feature. PinkMirror will then apply a set of filters to smooth the skin, whiten teeth, reduce redness, and more. Once done, you can easily download the image, But the white PinkMirror watermark will be seen in the lower-left corner. You will have to pay to have a watermark-free image, although you may be able to crop and delete it.
Finally, we introduce a few other websites in the form of a list by which you can increase the quality of your image:
- photos
- photoenlarger
- picturetopeople
- imageenlarger
- lunapic
last Word
In this article, various methods were introduced, including applications and websites to increase the quality of images. There must be other options for doing so, But we tried to gather the best ones so that you can use them. We hope you find this article useful.