


4 Ways to Format a Hard Disk
Today, I am at your service with hard drive format training. This time I am going to teach you how to format your hard drives. Formatting the hard disk has several methods that can be used depending on the need.
As you know, we may need to delete data on our hard drives for many reasons. This can be done in two ways: one is the normal deletion, that is to delete, and the other is Format. In the first method, we may want to delete several files or folders in a partition or drive. But in the second method, i.e. formatting, we don’t have the right to choose, and that partition or drive is completely deleted and all its contents are also deleted…
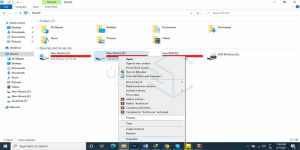
Well, friends, without wasting time, let’s get to the point. To format a hard drive, first enter This Pc or My Computer. Then we right-click on one of the drives that we want to format and then click on the Format option.
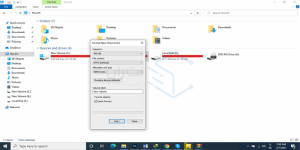
Now you can manipulate the settings in the opened box. You can specify the format in the File System section. For example, NTFS or FAT32, I always use NTFS because it supports files larger than 4 GB. Other items are in their most standard state. You can only change the name of the drive after formatting.
You can also remove the Quick Format check box so that the hard drive format operation takes longer. After making the settings, click on the Start option to start the format. When the format is finished, it will send you a message that the operation is finished.
Hard drive format during installation of Windows 10, 8 and 7
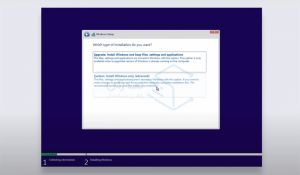
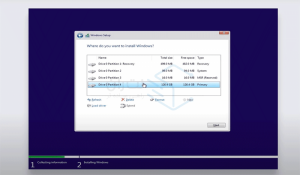
Friends, we assume that you have a laptop or system and your hard drive is on that device. Now you want to change Windows and you want to format the rest of the drives at the same time you change Windows. To start, after booting Windows to this stage, we choose the lower option (in the picture below) because the upper option only updates Windows.
Here we will come across a box that shows our drives and partitions. Now select any one you want by clicking and click on the Format option at the bottom of the screen. Wait a few moments, the partition will be formatted and you can go to the next drive.
How to format hard drive through CMD
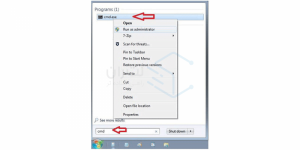
I am going to teach you how to format your hard drive and drives through CMD. First, click on the Start button and type CMD. Right click on CMD.EXE and select Run as administrator.
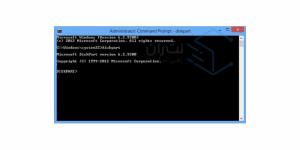
Well, now you will face a black screen which is CMD and the Command Prompt window will open.
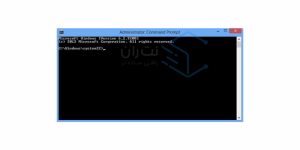
In this section, you must enter the diskpart command and then press the enter button to execute the command.
You can see the output of the above command in the image below.
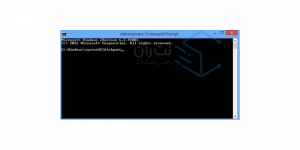
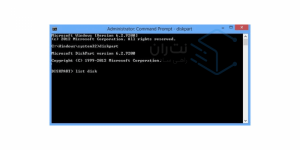
But now we have to type a new command: write the text list disk and press enter.
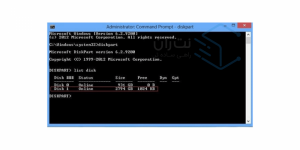
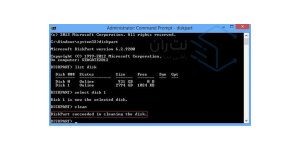
Now you see the list of hard drives that are connected to your device. Now suppose you want to format one of the hard drives. Enter the select a disk number command. Instead of disk number, you must enter the disk number and then press the enter button.
For example, I want to format hard drive number one. I type the command like this:
Select disc 1
Well, now a message will appear saying that the desired disk has been selected. The message in the figure below is characteristic. If you remember, we chose disc number 1. The message reads as follows: Disk 1 is now selected disk After seeing this message, write the clean command below it and press the enter button.
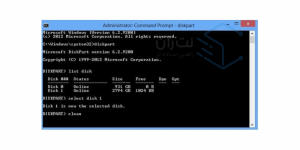
Now it says that the disk has been erased successfully. Depending on the capacity and quality of your hard drive, it may take a while. So you have to wait.
Well, friends, this is also from teaching hard drive format through CMD. I hope it started your work.
Hard drive or drive format training with DiskGenius program
To use this software, it is enough to install it on Windows and run it. As you know, this software comes and messes up the data 0 and 1 of the hard drive randomly, and with this move, it becomes very difficult to restore the information inside, which can be highly effective and can be harmful.
By using this software, you can almost be sure that the data will not be returned, but if the hard drive is on your personal computer and you may want to recover it later, it is better to do it with one of the methods I mentioned above.
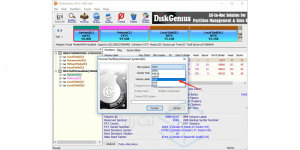
Well, open the program after installation and right-click on the desired partition and select Format Current Partition.

Now it will open with a box like the image below. According to the drop-down menu, select NTFS and click format. After finishing the work, an option will appear. Click Yes.
conclusion
You learned several ways to format a hard drive. From using Windows tools to using the command line and CMD. In the end, you formatted your hard drive using an external software.
There are several ways to format the hard drive, each of which can be used.
Remember that if you need to format only one drive, be careful not to format the entire hard drive.
Use quick format for new hard drives and use normal format for old and used hard drives. It is true that more time is spent on formatting the hard drive, but this operation is performed with higher accuracy and quality.
If your hard drive is damaged or has a bad sector, formatting it will not help you. It may even cause more damage and you will not be able to extract your data from the hard drive even if you spend money. So please be careful.
This training was only for the Windows operating system, and as soon as possible, we will provide you with training on formatting the hard drive in other operating systems. If you have any questions or comments, please let us know in the comments section.